Fixing up a Covielsa Neo Geo MVS Arcade Cabinet
Throughout the years, while building my collection, there has always been one thing at the top of my list of most wanted items: A vintage arcade cabinet. Last September, I finally went ahead and bought one.
I've been working on it periodically for the past few months. This involved quite a lot of tweaking, fixing and searching for obscure information. I won't be going into every little detail, since most of the process isn't that noteworthy. I'll provide an overview of what it takes to maintain one of these old machines. Additionally, I will be going over some things about this machine that are interesting or potentially useful for others.
There were a few requirements I had for the machine:
- Standard JAMMA harness / connector
- CRT display
- Neutral look; no artwork specific to one game or one of those generic 'multicade' artworks with 500 different characters, all with different artstyles.
- Controls that would be suitable for a wide range of games.
What I bought
At first, I didn't know many details about the machine. The info I got from the listing and the seller was enough for me to want it though, as it met my requirements.
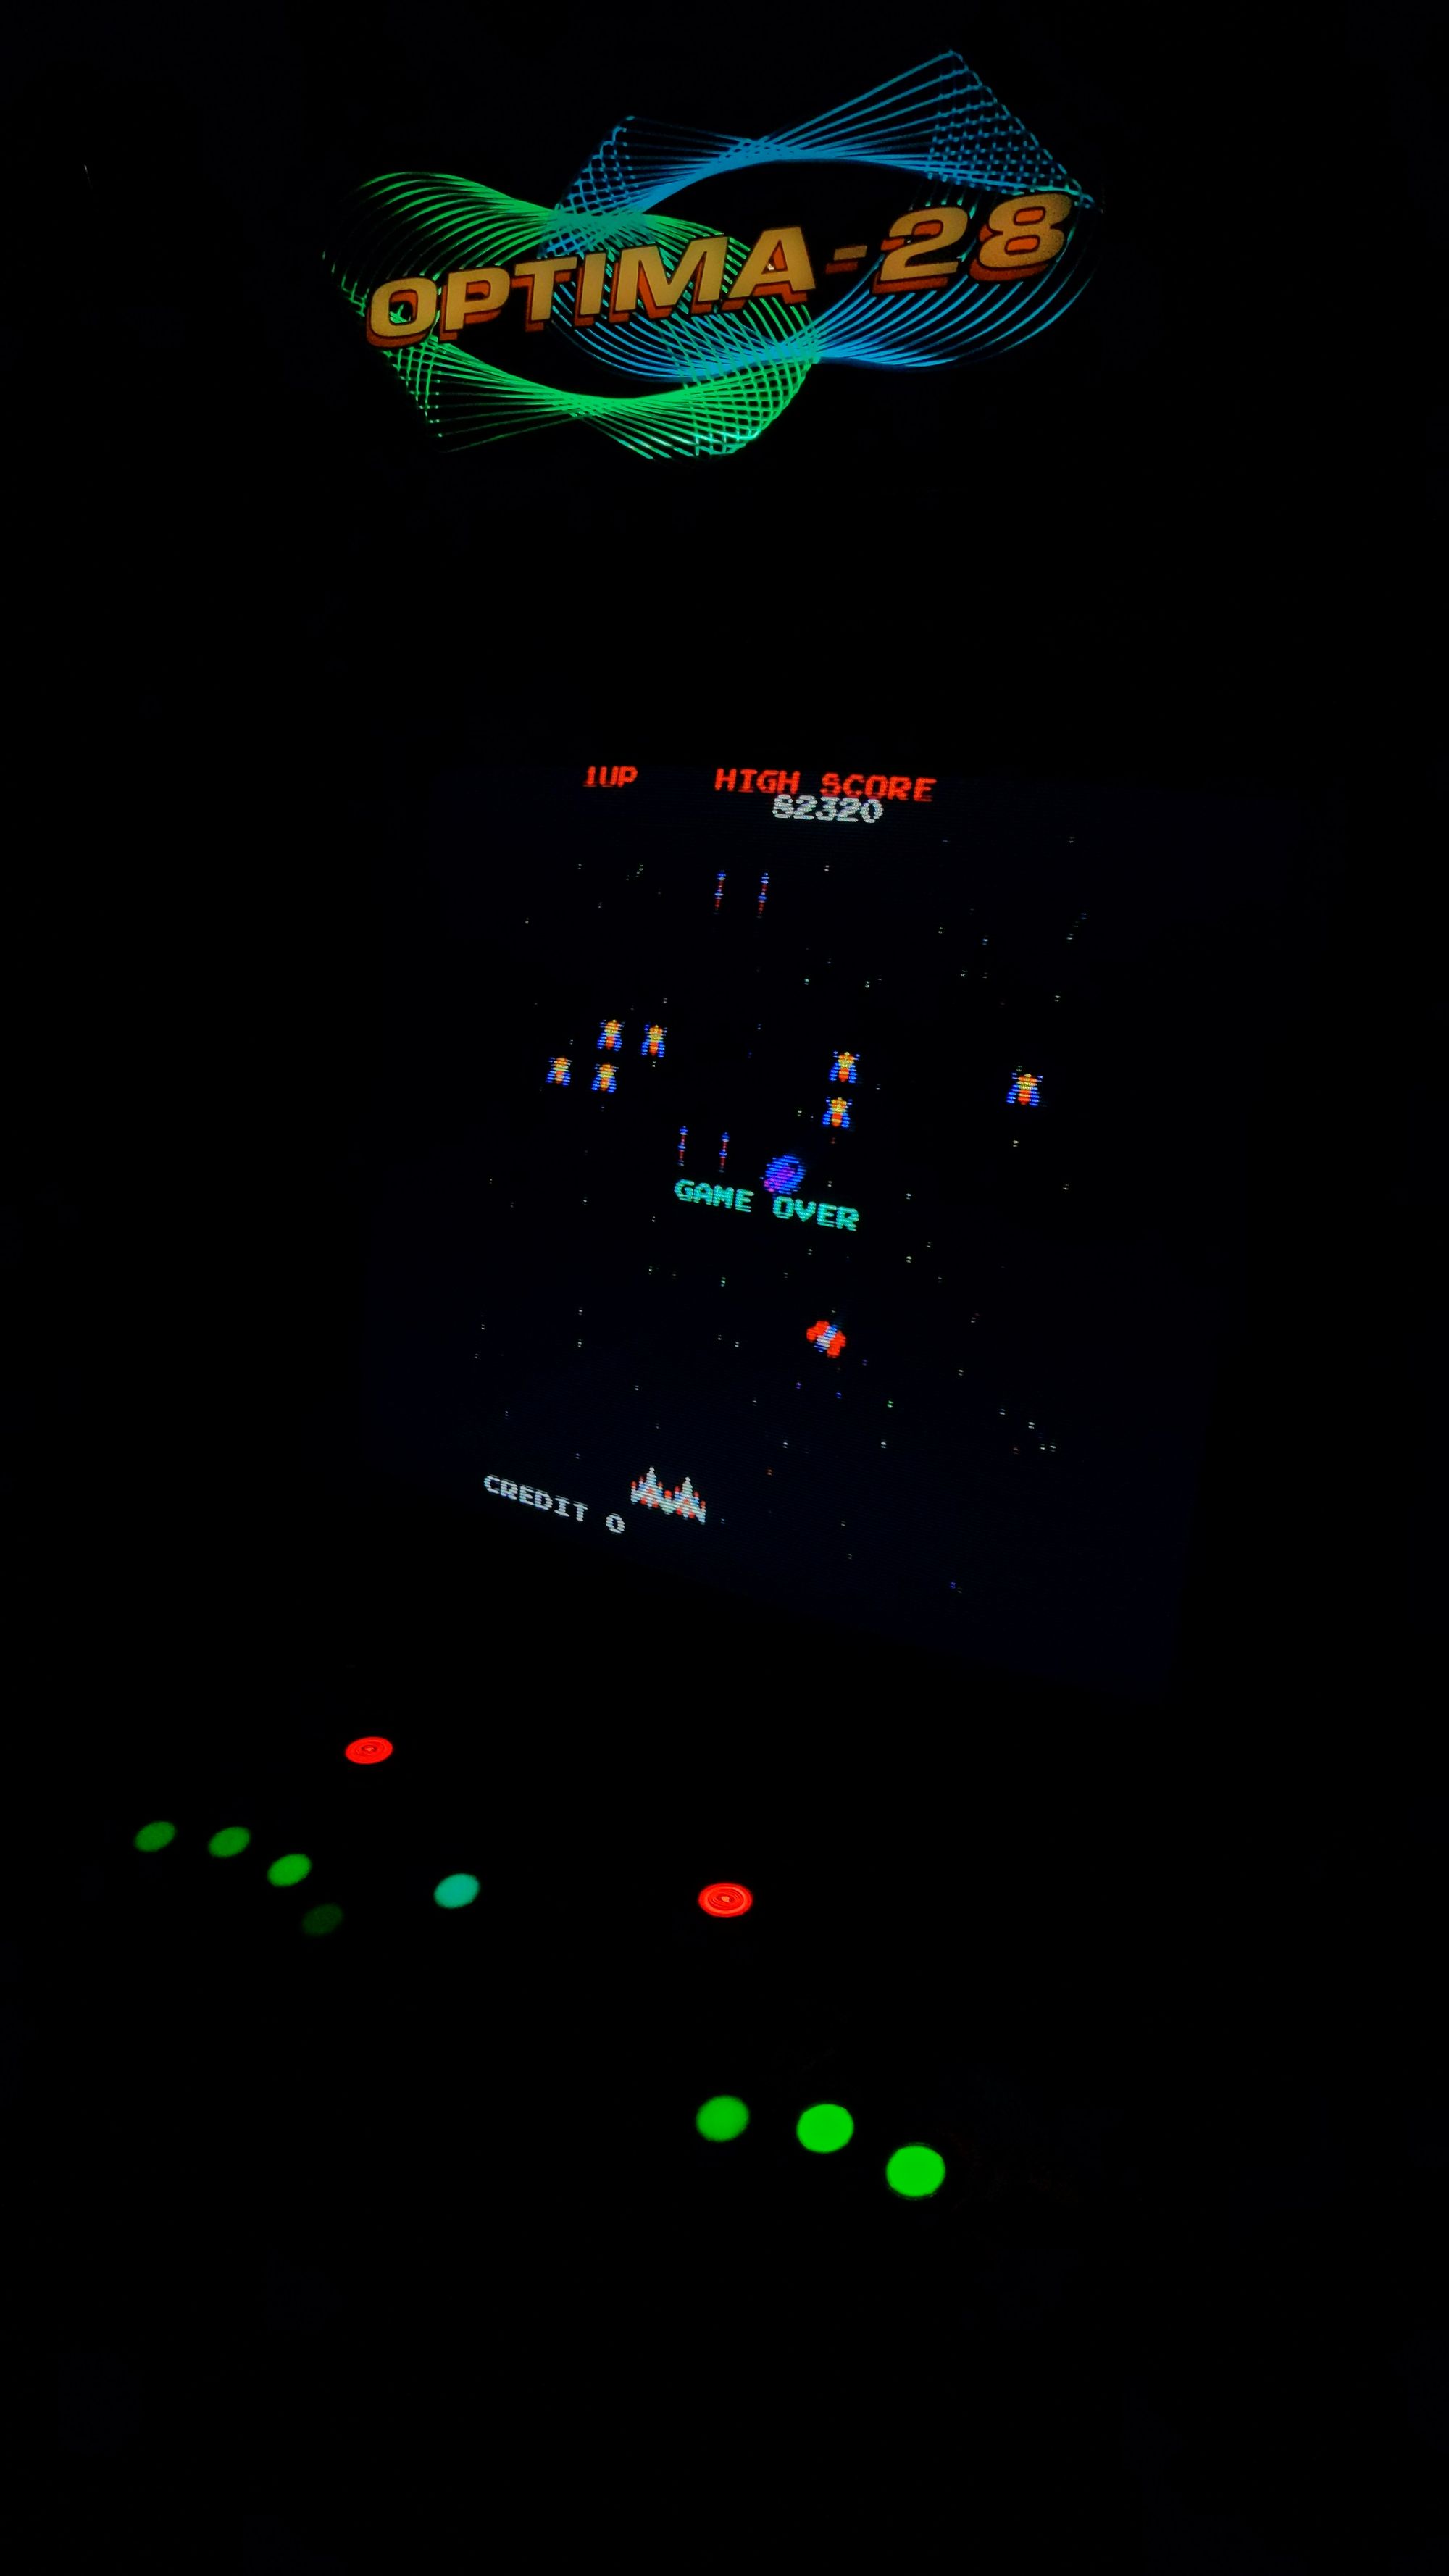
I won't keep you in suspense, this was the machine right after getting it home:
Now for some of the details I figured out from the stickers on the inside of the machine.
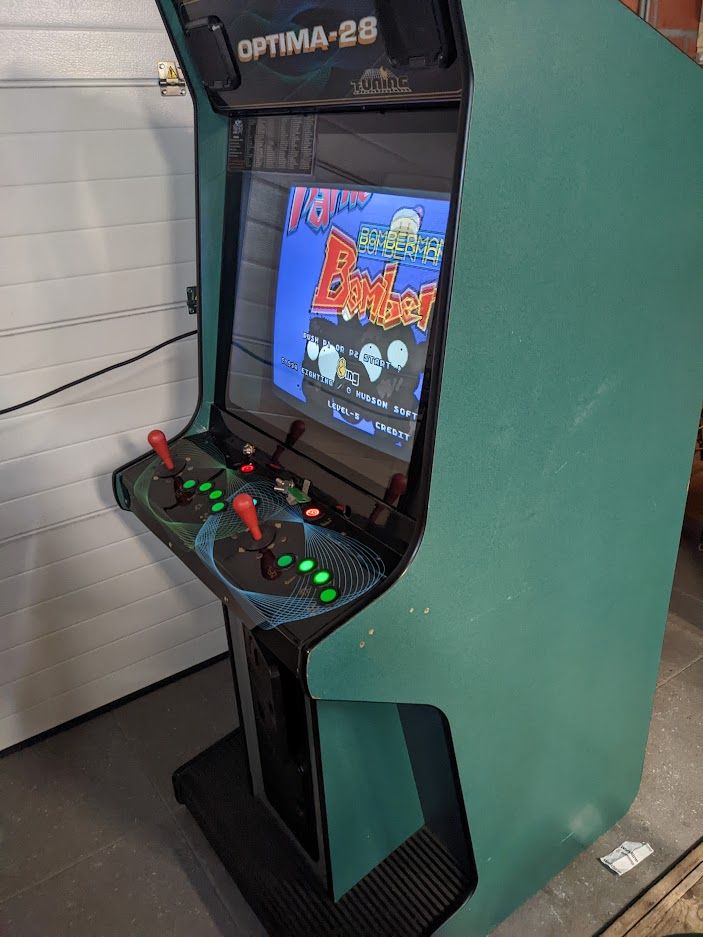
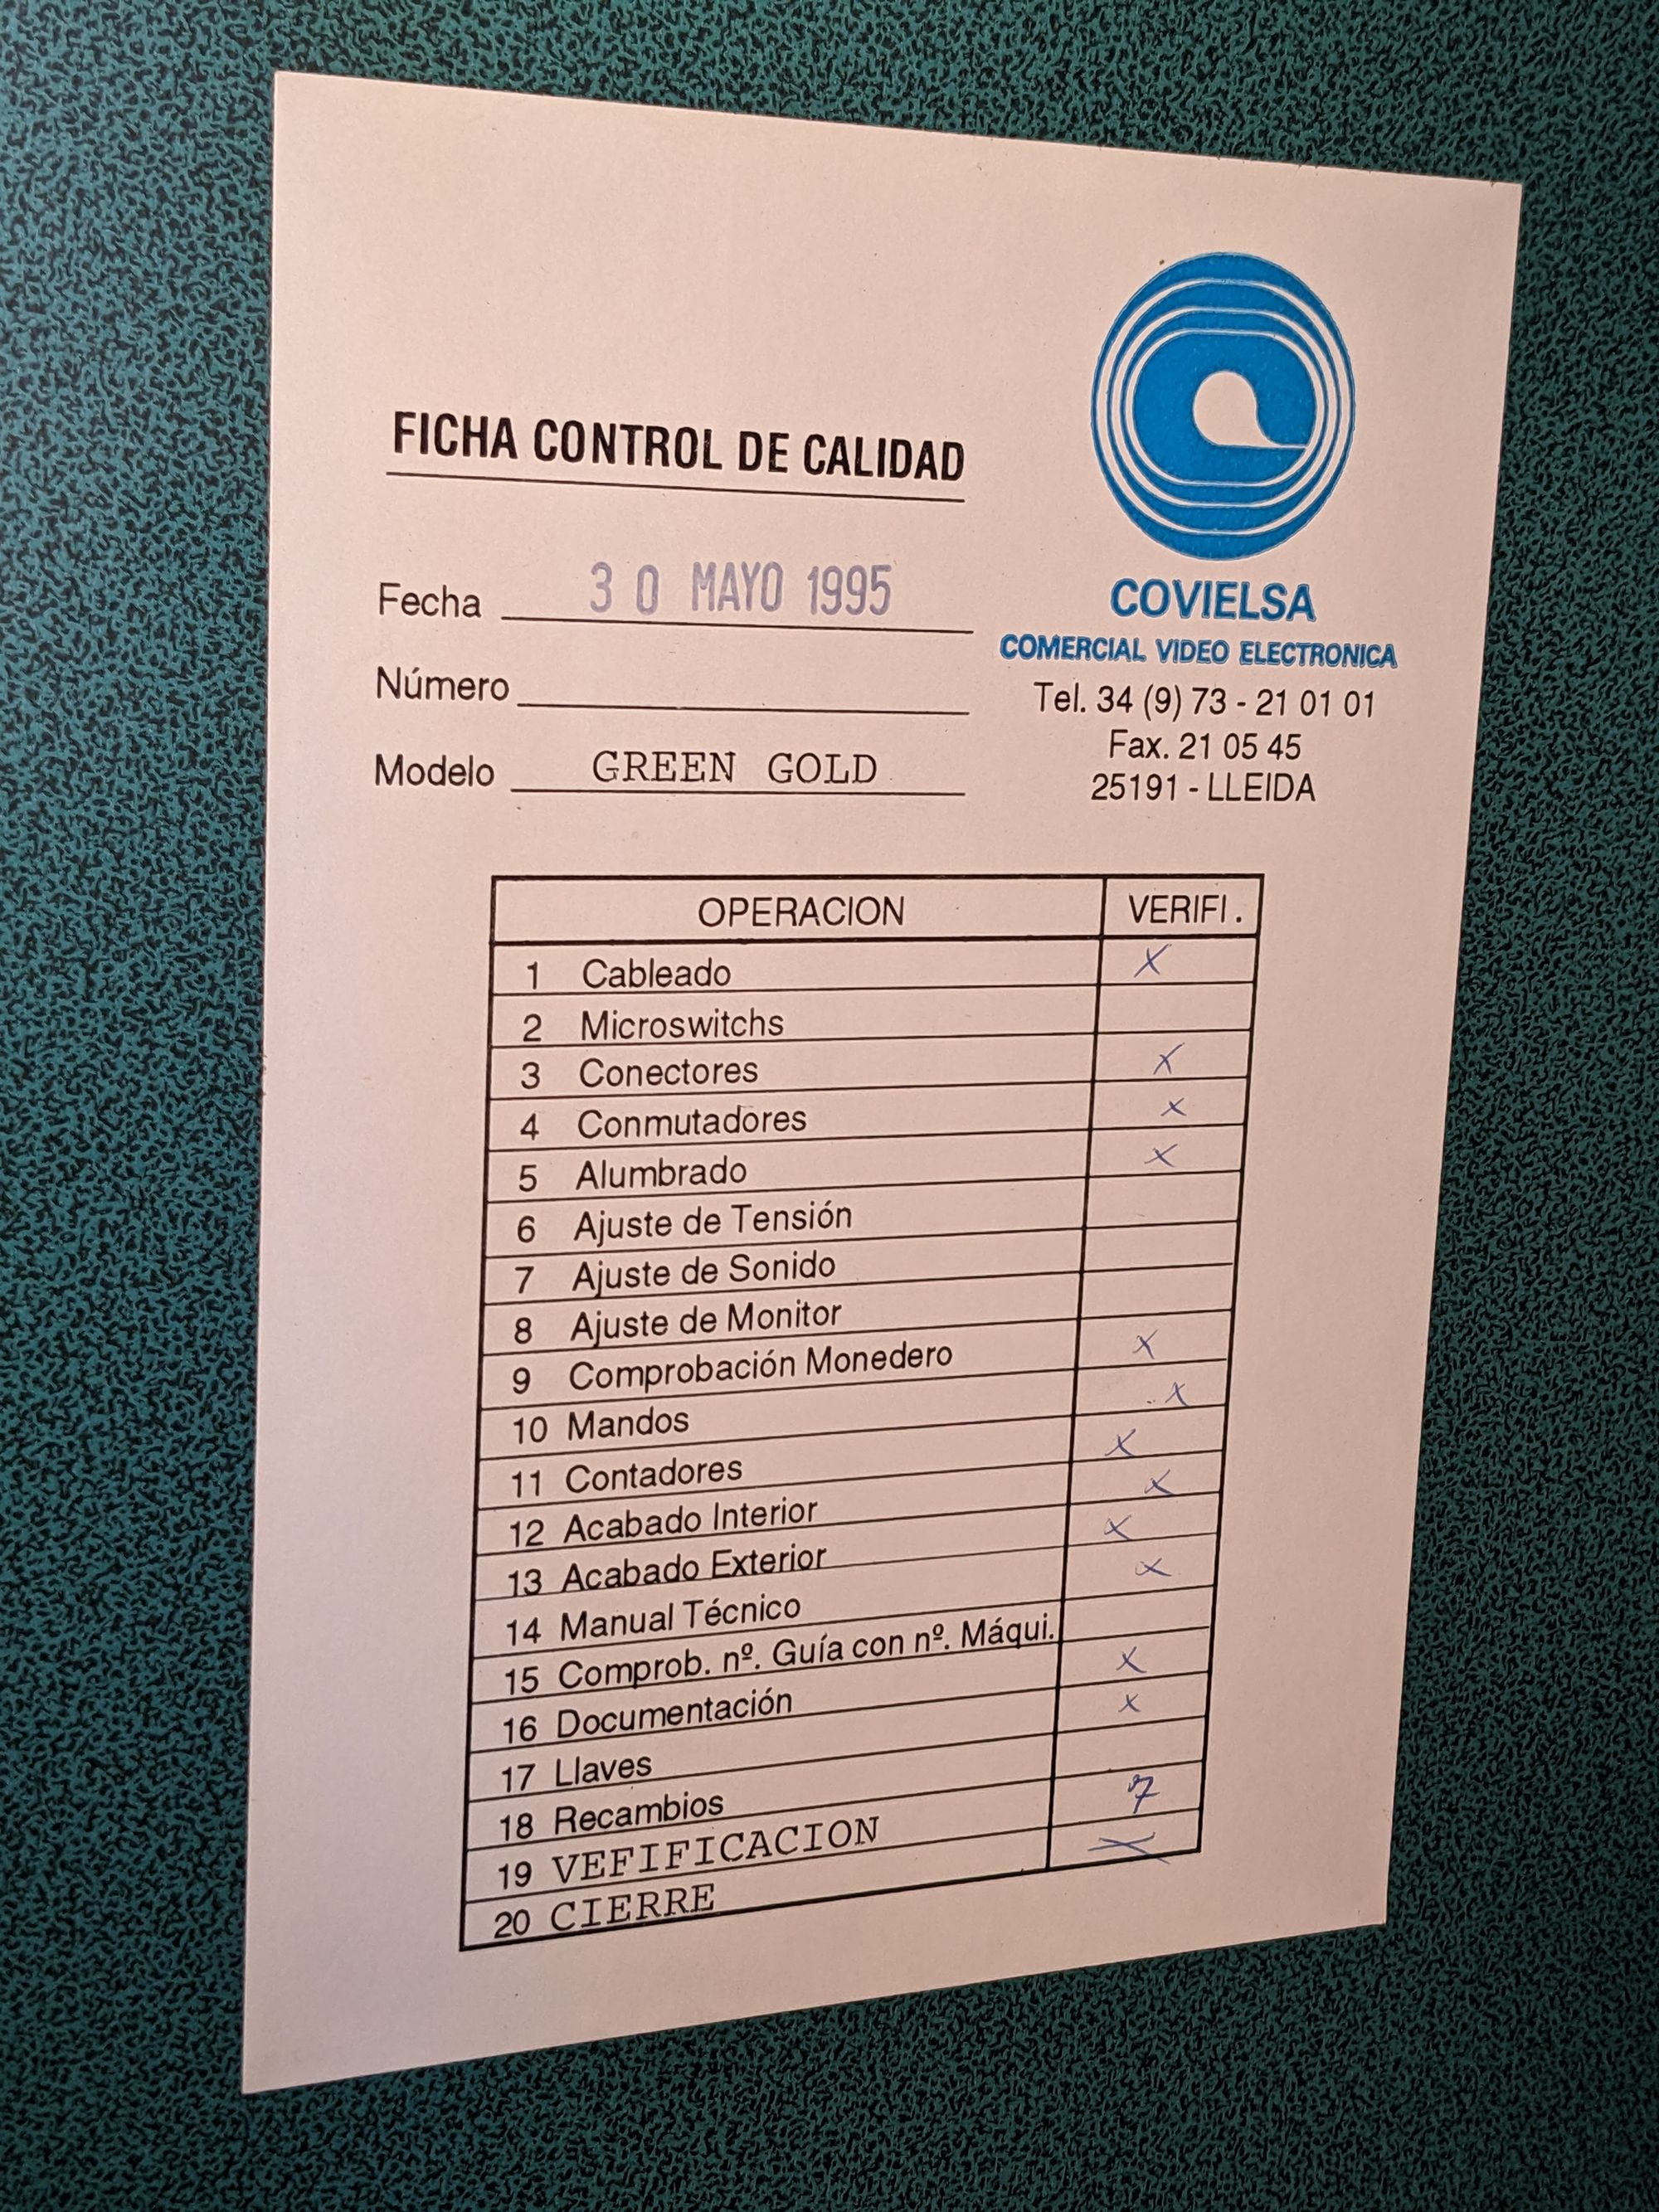
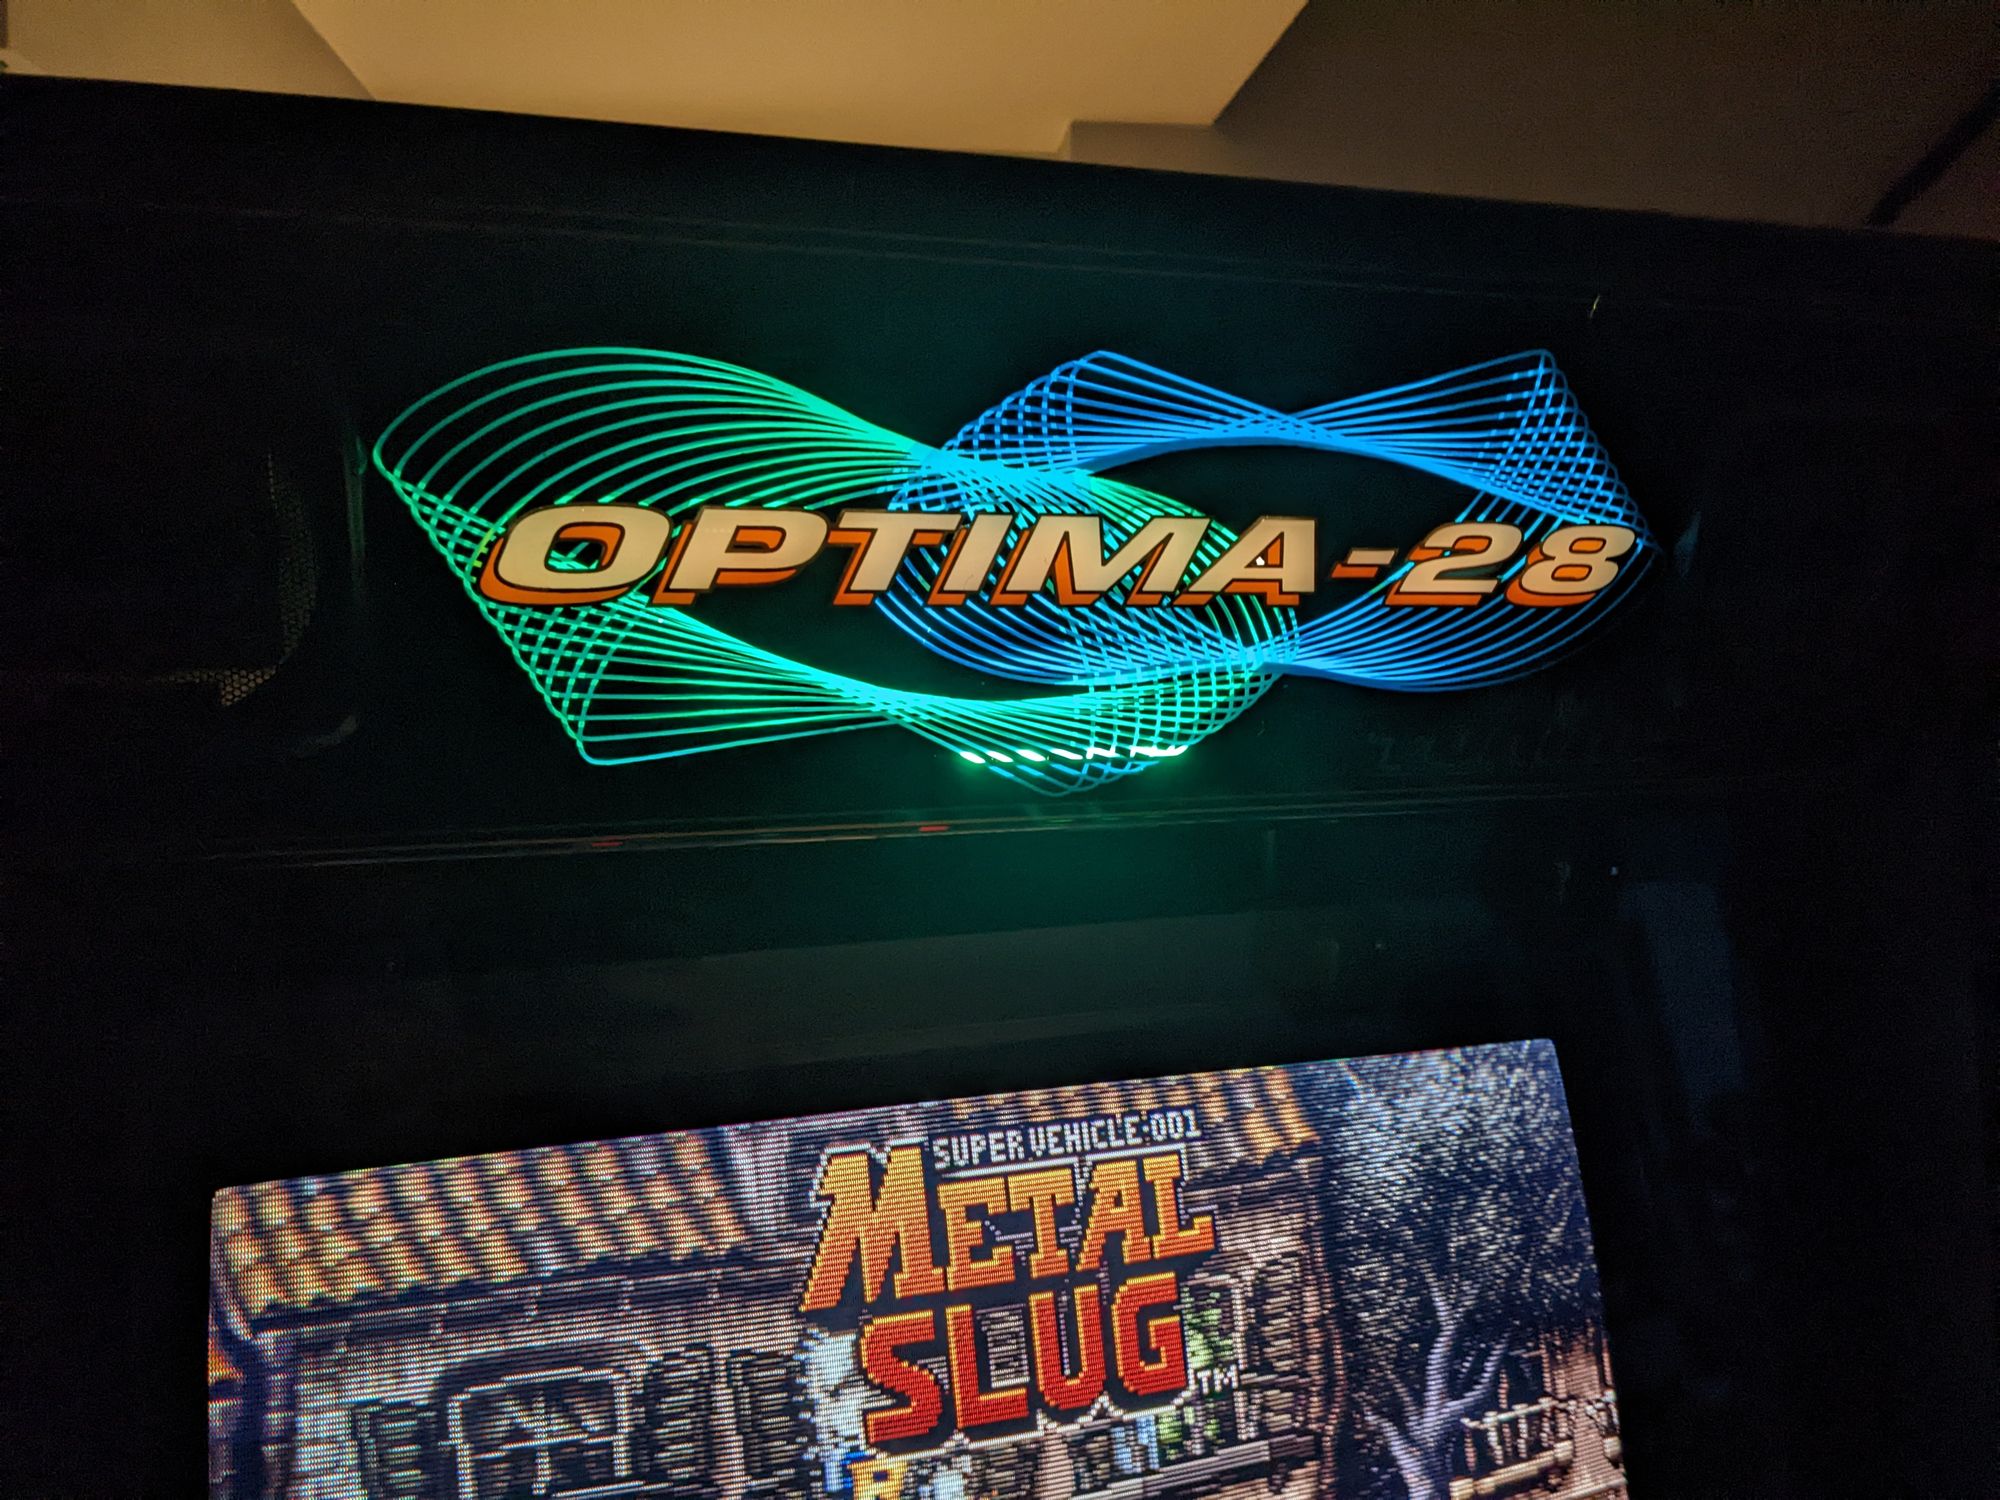
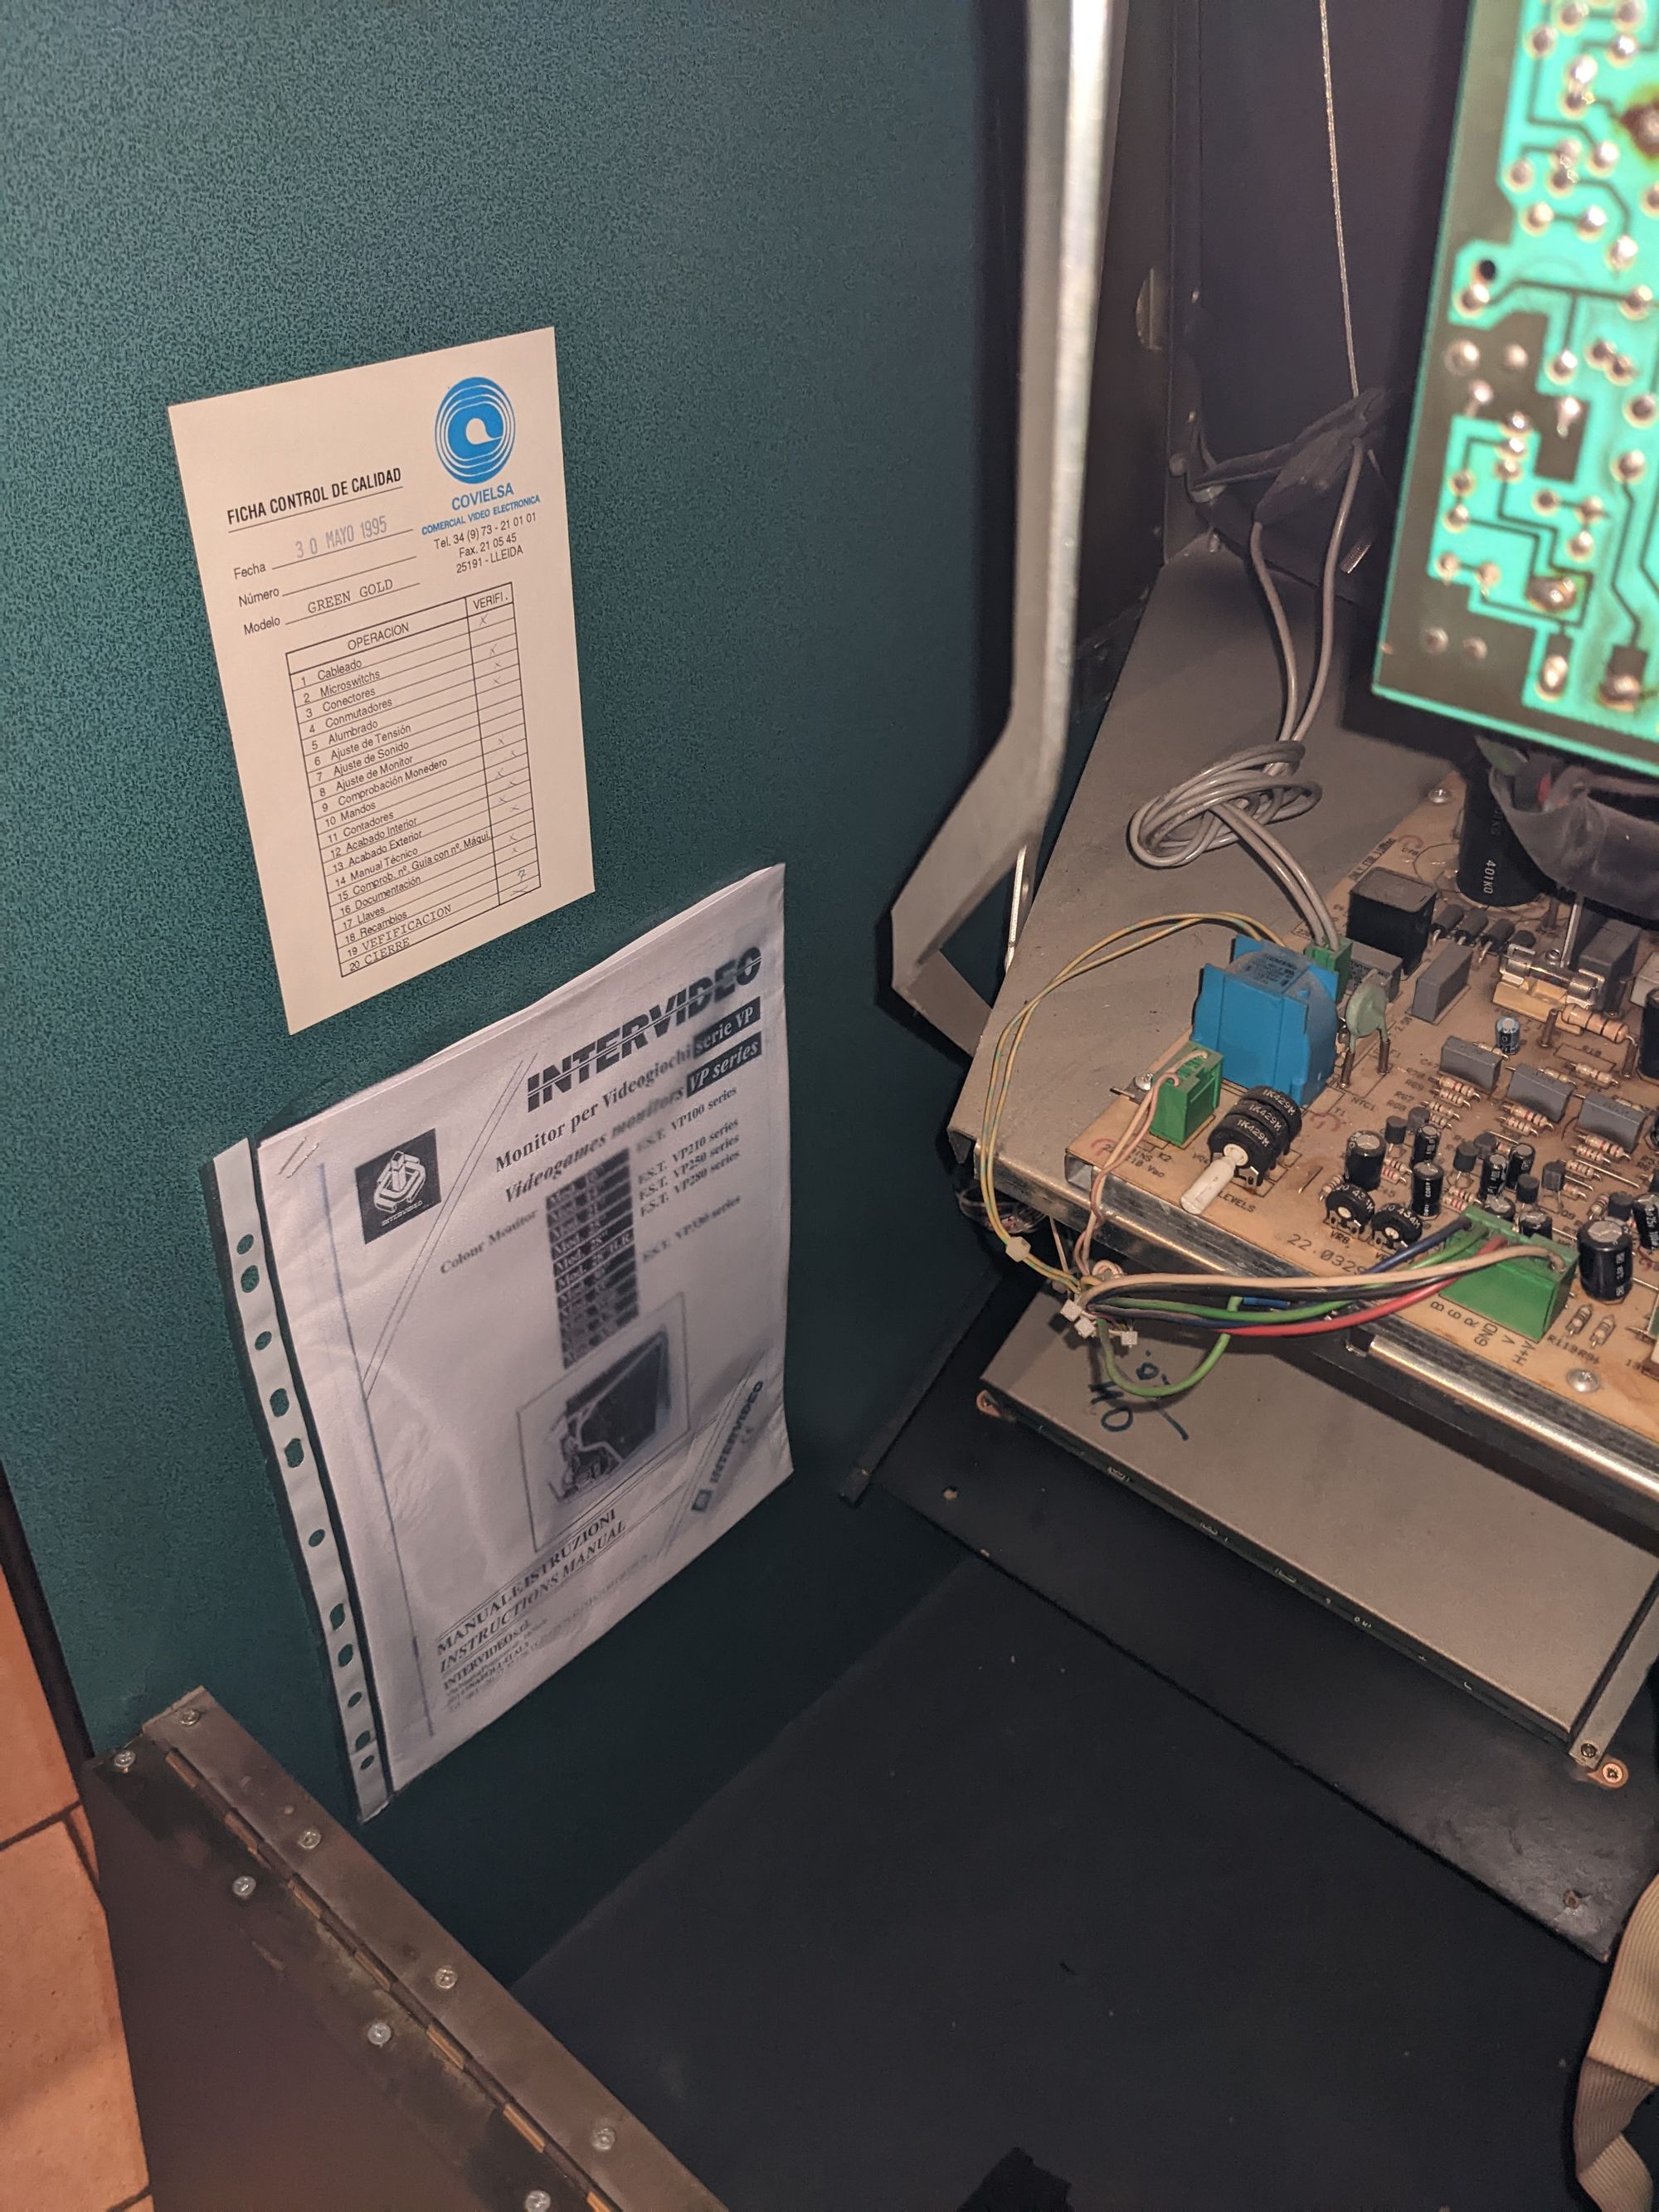
This arcade cabinet was manufactured in May of 1995 by a Spanish company named Covielsa. The original name of the machine is "Green Gold". But as you can tell, the marquee of my machine says "Optima-28 Tuning". I could find little to no information about this, other than a tweet saying that the Optima-28 was supposedly a rebranding of the Green Gold machine by a German company named Tuning, which sounds plausible.
From what I could find online, the Green Gold was seemingly a generic JAMMA arcade machine that could be customised to the customer's liking. You could see it as a 'template-cabinet'. There were options for light guns, different button layouts, different arcade PCBs, etc. I've even seen some pictures of ones with a steering wheel and pedals.
This is what mine came with:
- A Neo Geo MVS 2-slot PCB (MV-2F)
- 28" Intervideo VP280 CRT monitor
- Standard Neo Geo button layout with cherry switches
- 150-in-1 MVS multicart (probably installed later in the machine's life)
- VIC-9916A power supply (not likely the original PSU)
The seller was also able to give me some details about the history of this particular cabinet: It was originally used in a Luna Park that travelled around the country from fair to fair. It was then later put in a fast food restaurant for people to play for free until recently. So it has had quite the life.
Repairs and cleaning
As you saw in the photo above, the cabinet was in (somewhat) working condition but it had several problems:
- Sound was not working
- CRT monitor made a hissing sound and was poorly adjusted
- The coin mechanism was missing completely
- PSU had unstable voltage output
- Marquee light wasn't working
- All locks were either difficult or impossible to move
- The Neo Geo MVS wasn't saving any settings or highscores
- The general cosmetic condition was rather poor
Let's go over the cause of each issue and how I fixed them. I won't bore you with the cleaning part however, there's not much to say about it, it just took a lot of time.
Sound
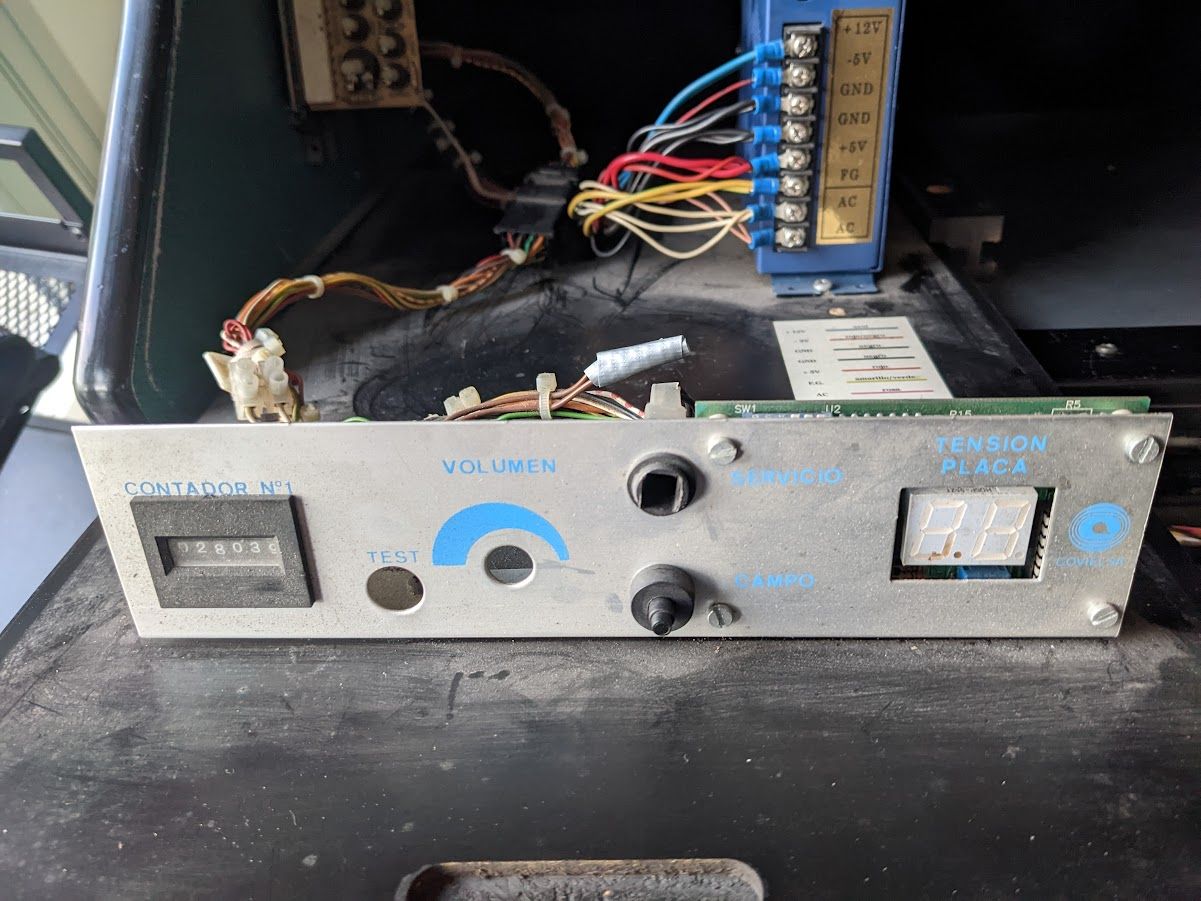
The sound was a simple fix. As it turned out, the speakers were simple no longer connected. The previous owner cut the wires going from the JAMMA harness to the speakers. I simply soldered them back together and the sound worked right away. One thing worth noting here: Inside the cabinet is a little control panel with an empty spot for a volume adjustment potentiometer. I don't know if it was ever installed in my cabinet, but I have seen pictures online of these Covielsa cabinets that did have it. I decided not to install one though, seeing as the speakers work and sound just fine when directly connected to the MVS board. I can use the Neo Geo's built-in volume slider to adjust them as needed.
Monitor
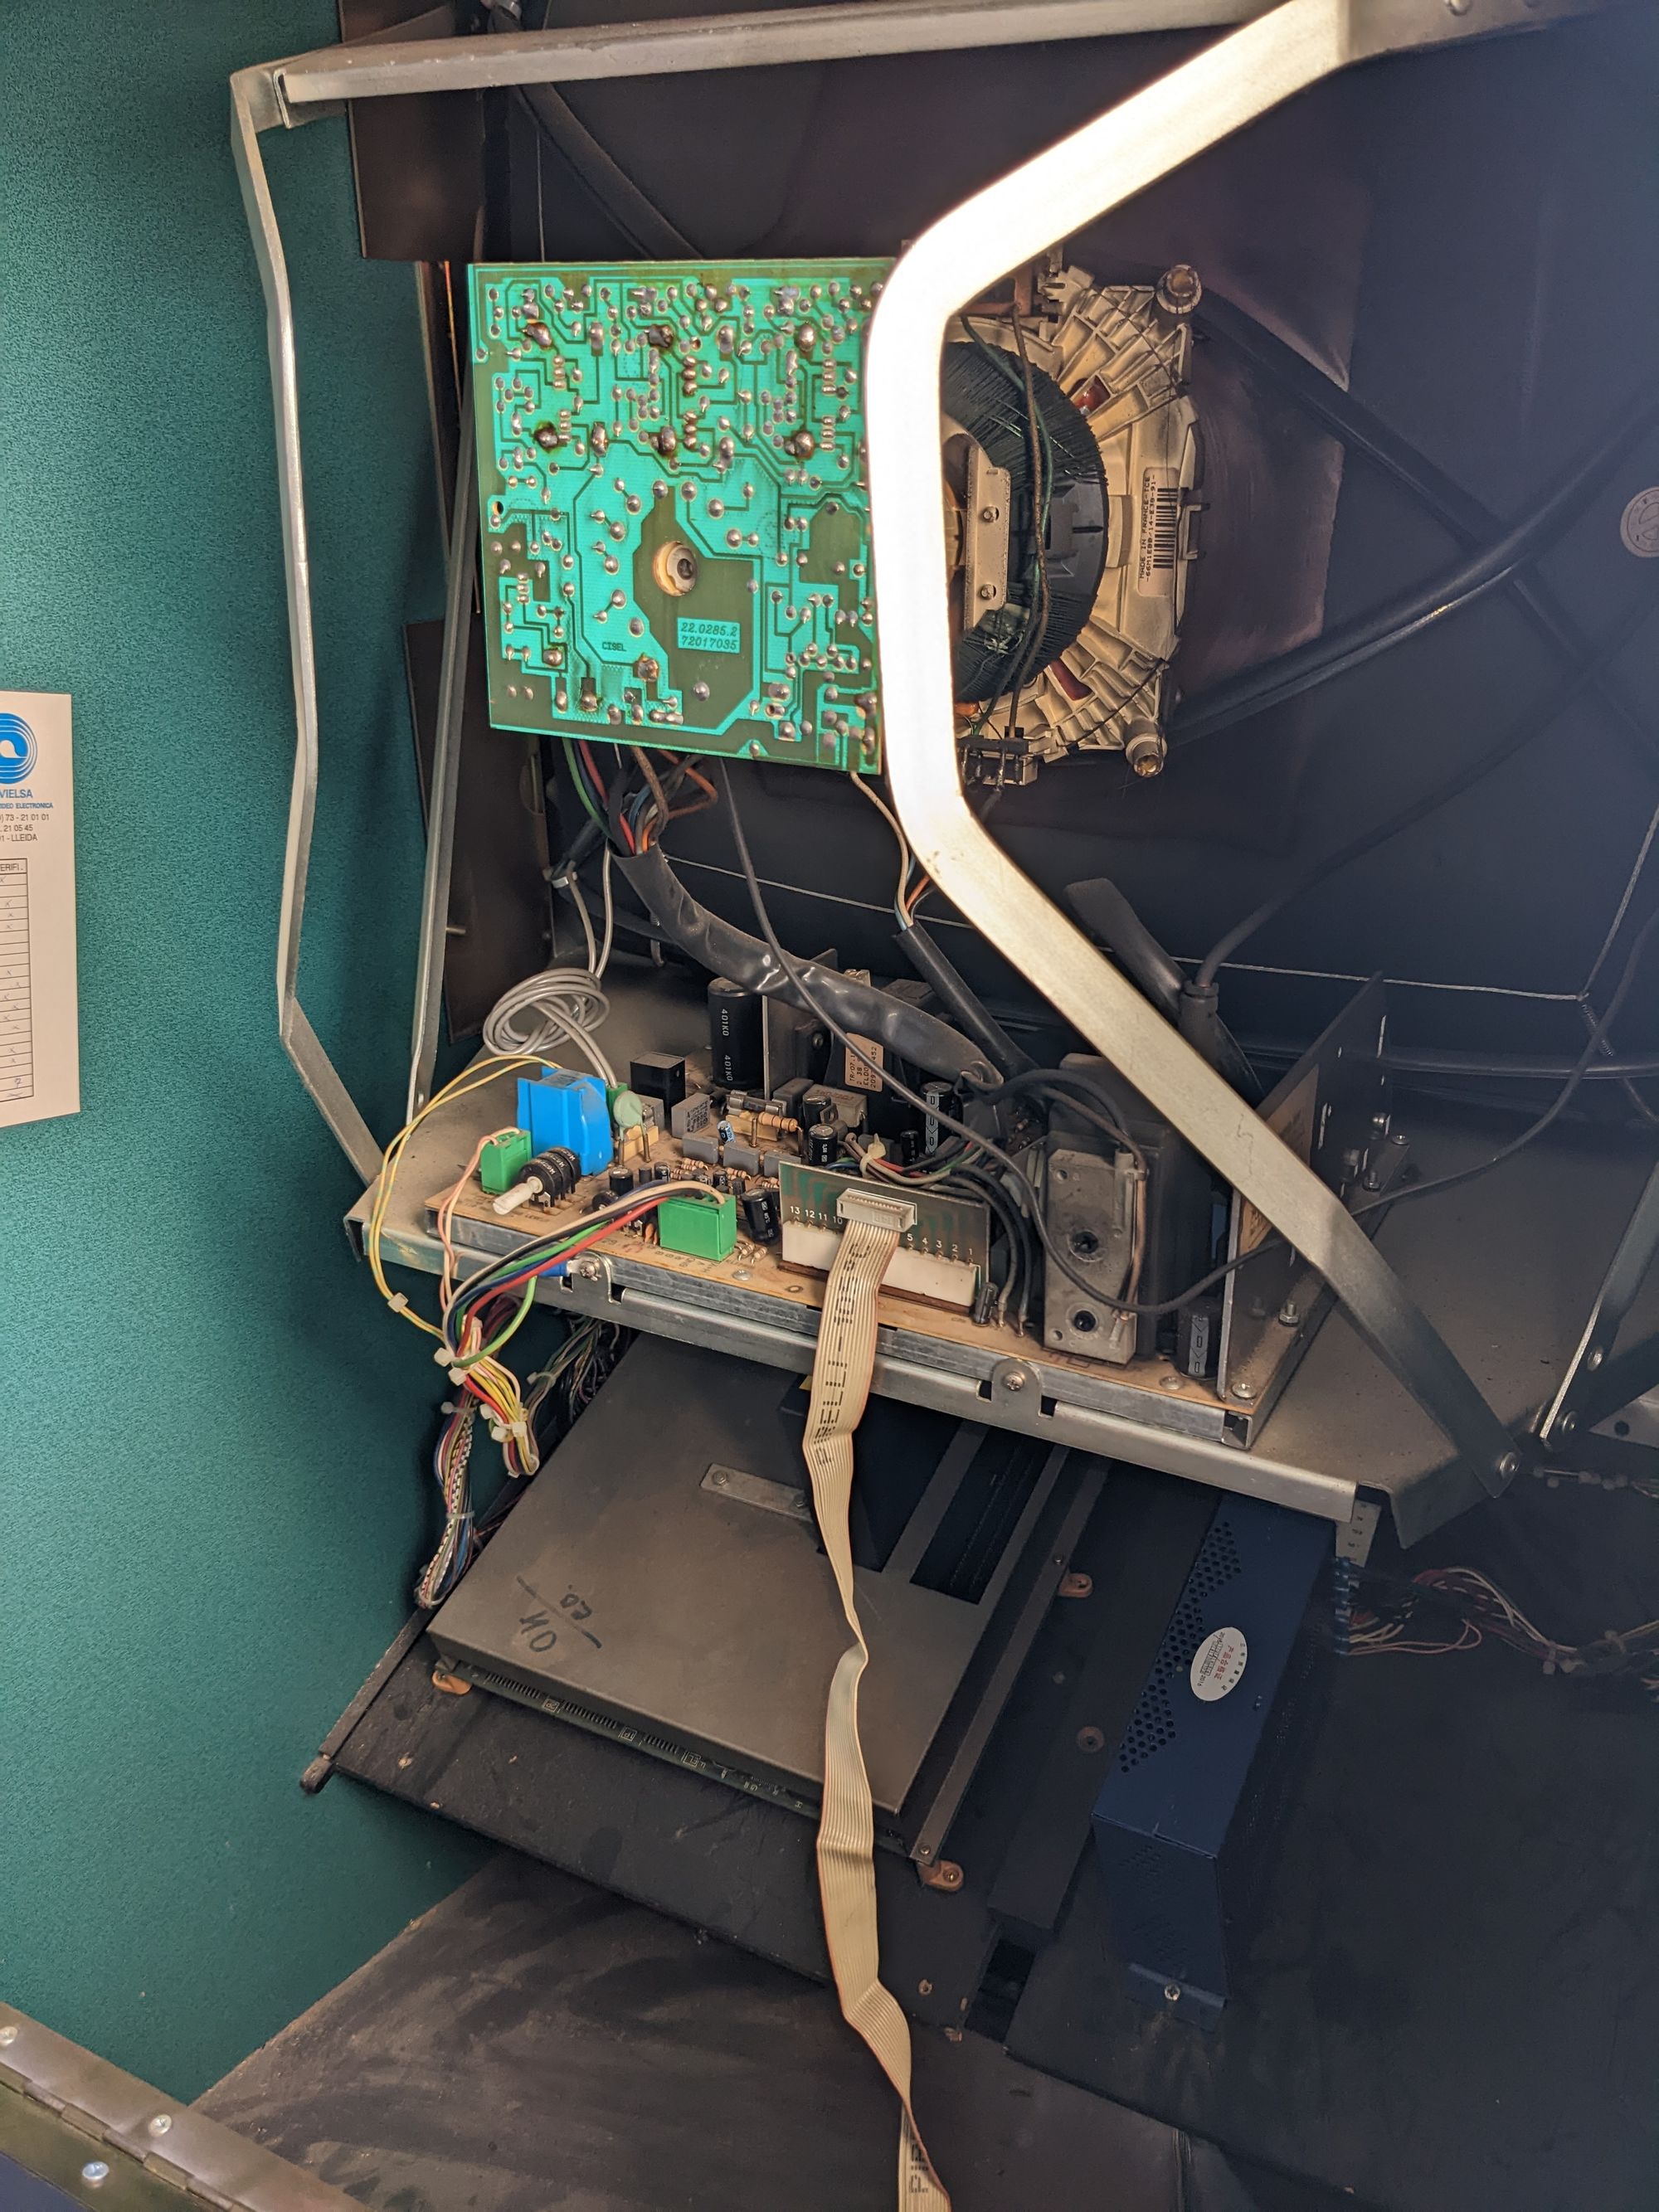
The CRT monitor had several issues. The video was poorly adjusted, there was a distracting hissing noise, and the picture would develop a green hue after a few minutes. I started by cleaning the tube, as it was absolutely caked in black dust. I had a suspicion that the hissing sound was electricity arcing from the anode cap. I cleaned the area around the anode cap very well and added some dielectric silicone grease under the cap to create a better seal. And sure enough, that fixed it.
Now for the picture adjustments. The monitor has a ribbon cable going from the chassis to a little daughter board that's accessible from the front of the cabinet. This board had adjustment potentiometers for sizing, brightness and contrast. With these pots, I was able to fix all issues except for the green hue. I took a look at the service manual for the monitor, which showed colour adjustment potentiometers for red, green and blue. However, these three pots were put next to each other with the dial going through all three of them. So they could only be adjusted together, but not individually. I could get rid of the green hue this way but it would mess up the colours in other ways.
At first, I decided to leave it as-is, as it wasn't that bad. But after a few months it started to annoy me enough to give it another go. I looked at the manual again and noticed there was another potentiometer for 'green adjustment'. No idea how I missed that, but adjusting this potentiometer fixed the issue.

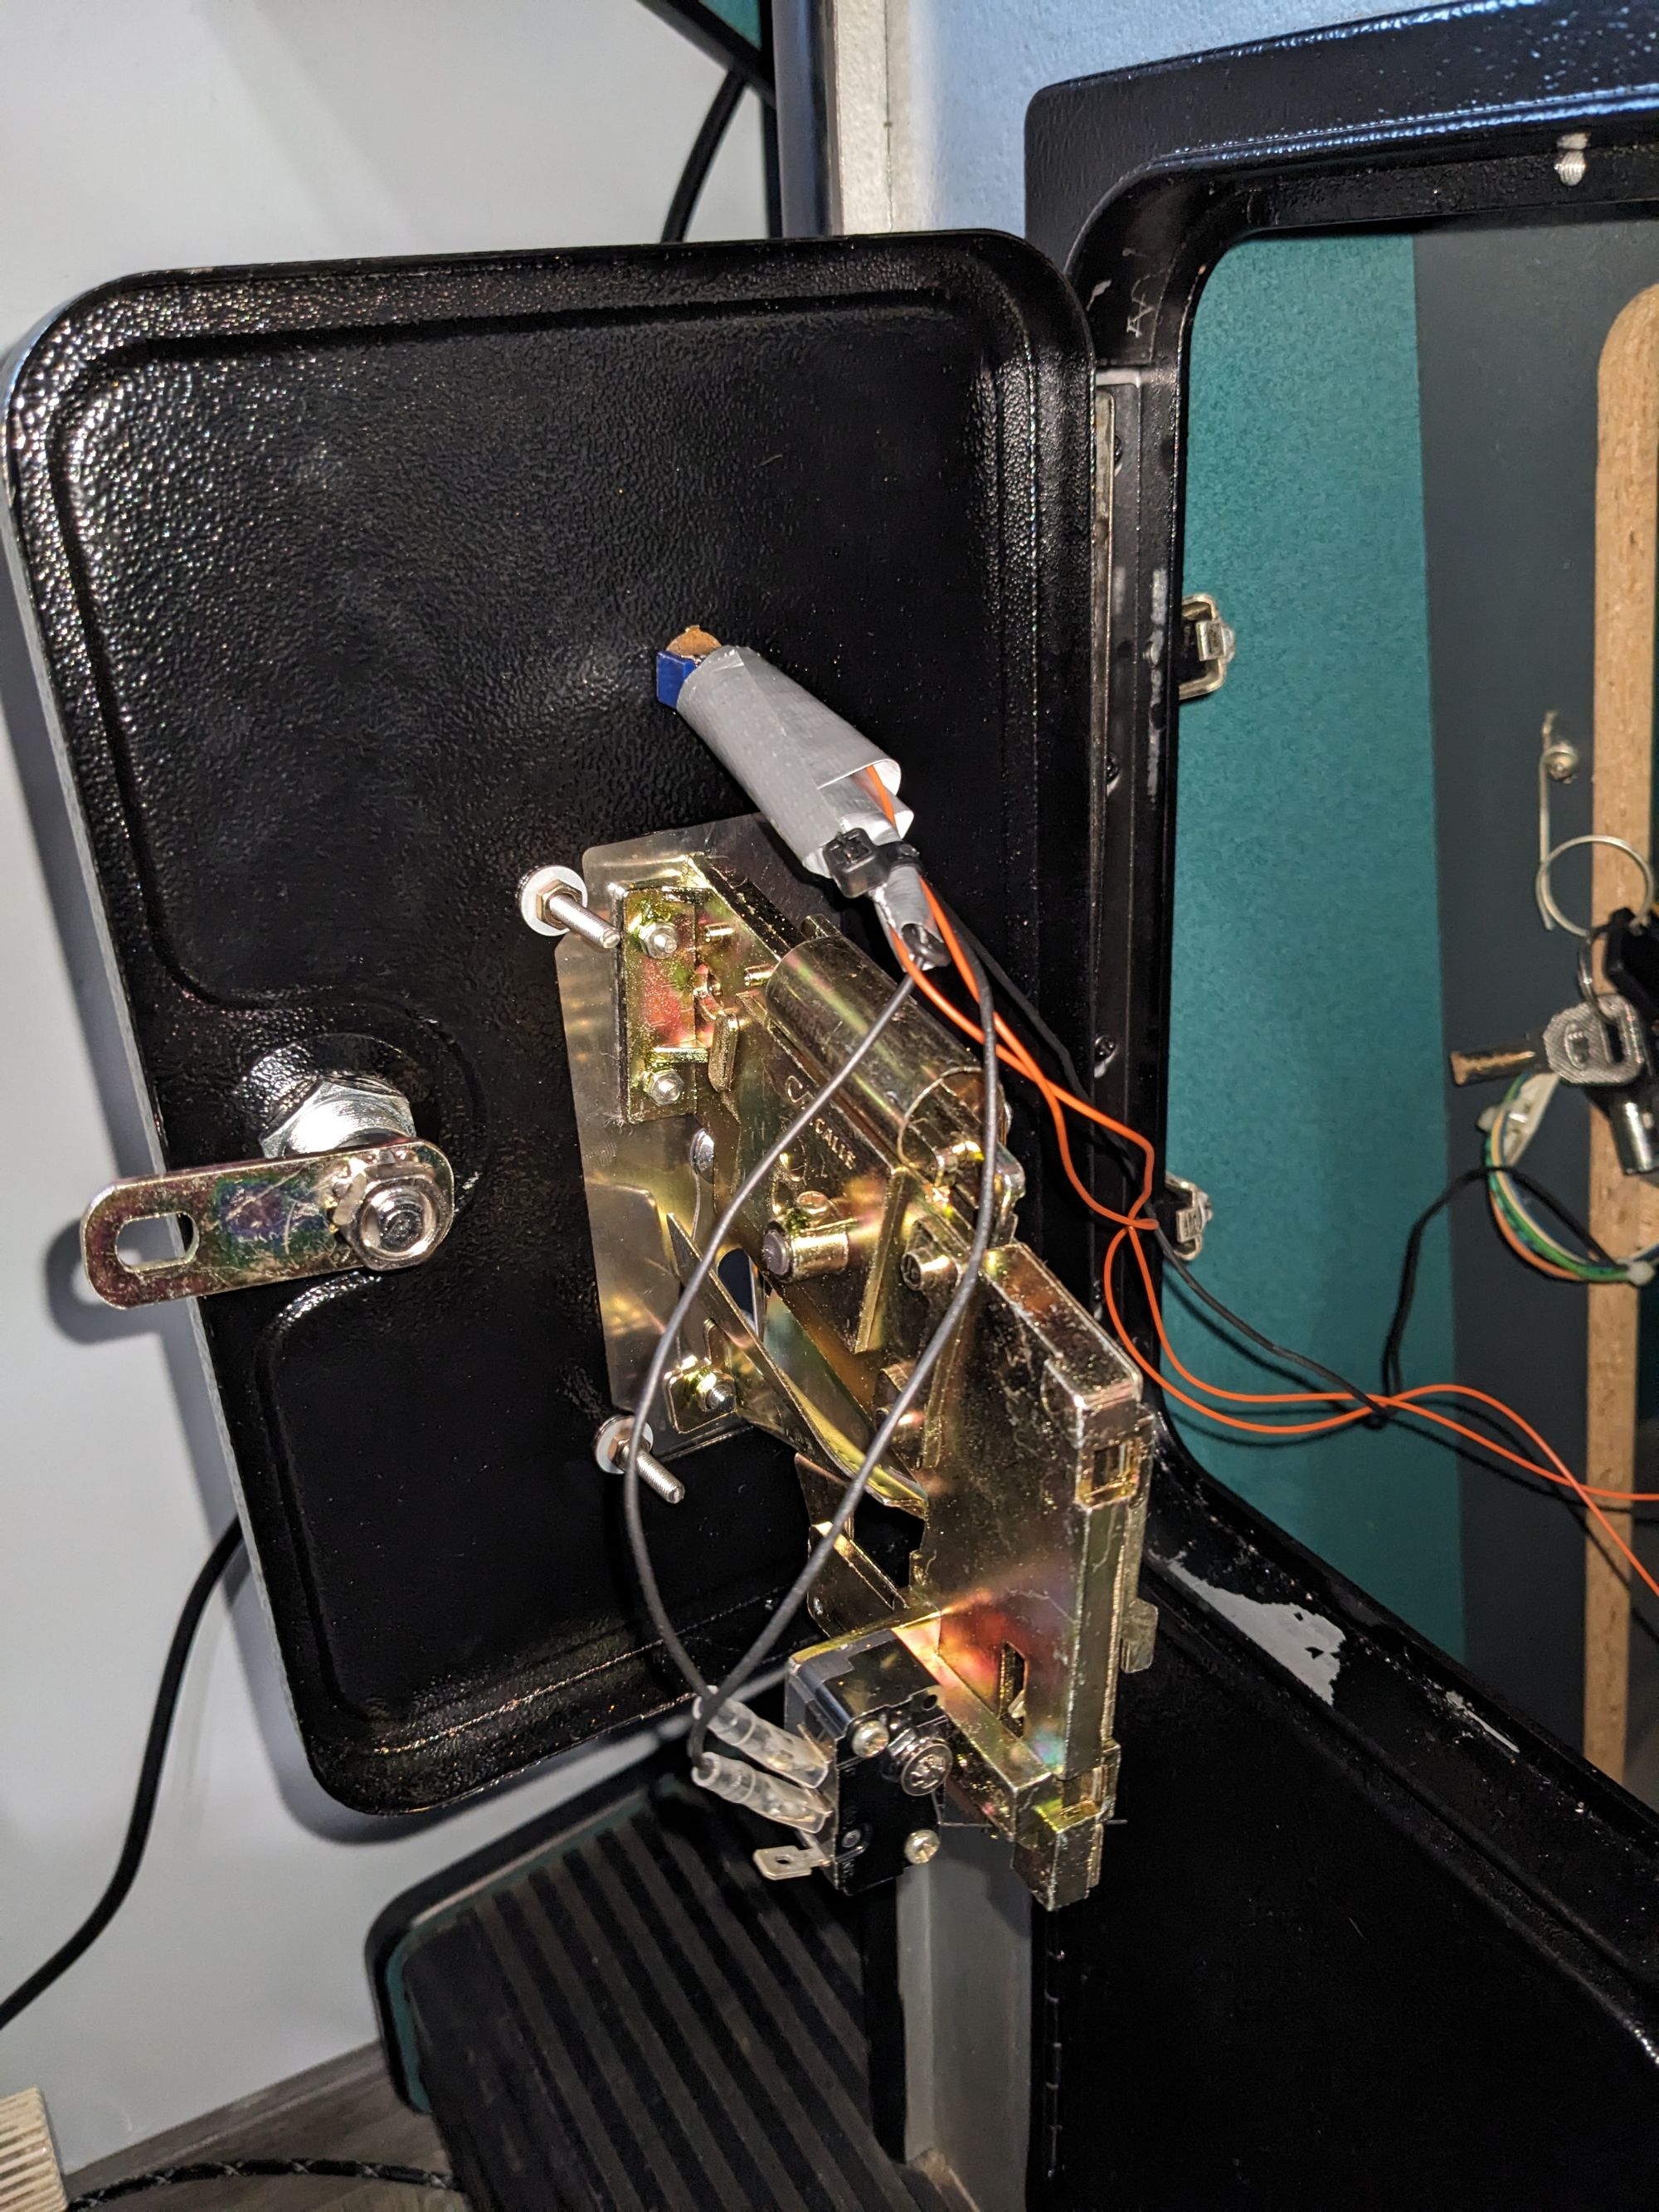
Coin mechanism & door
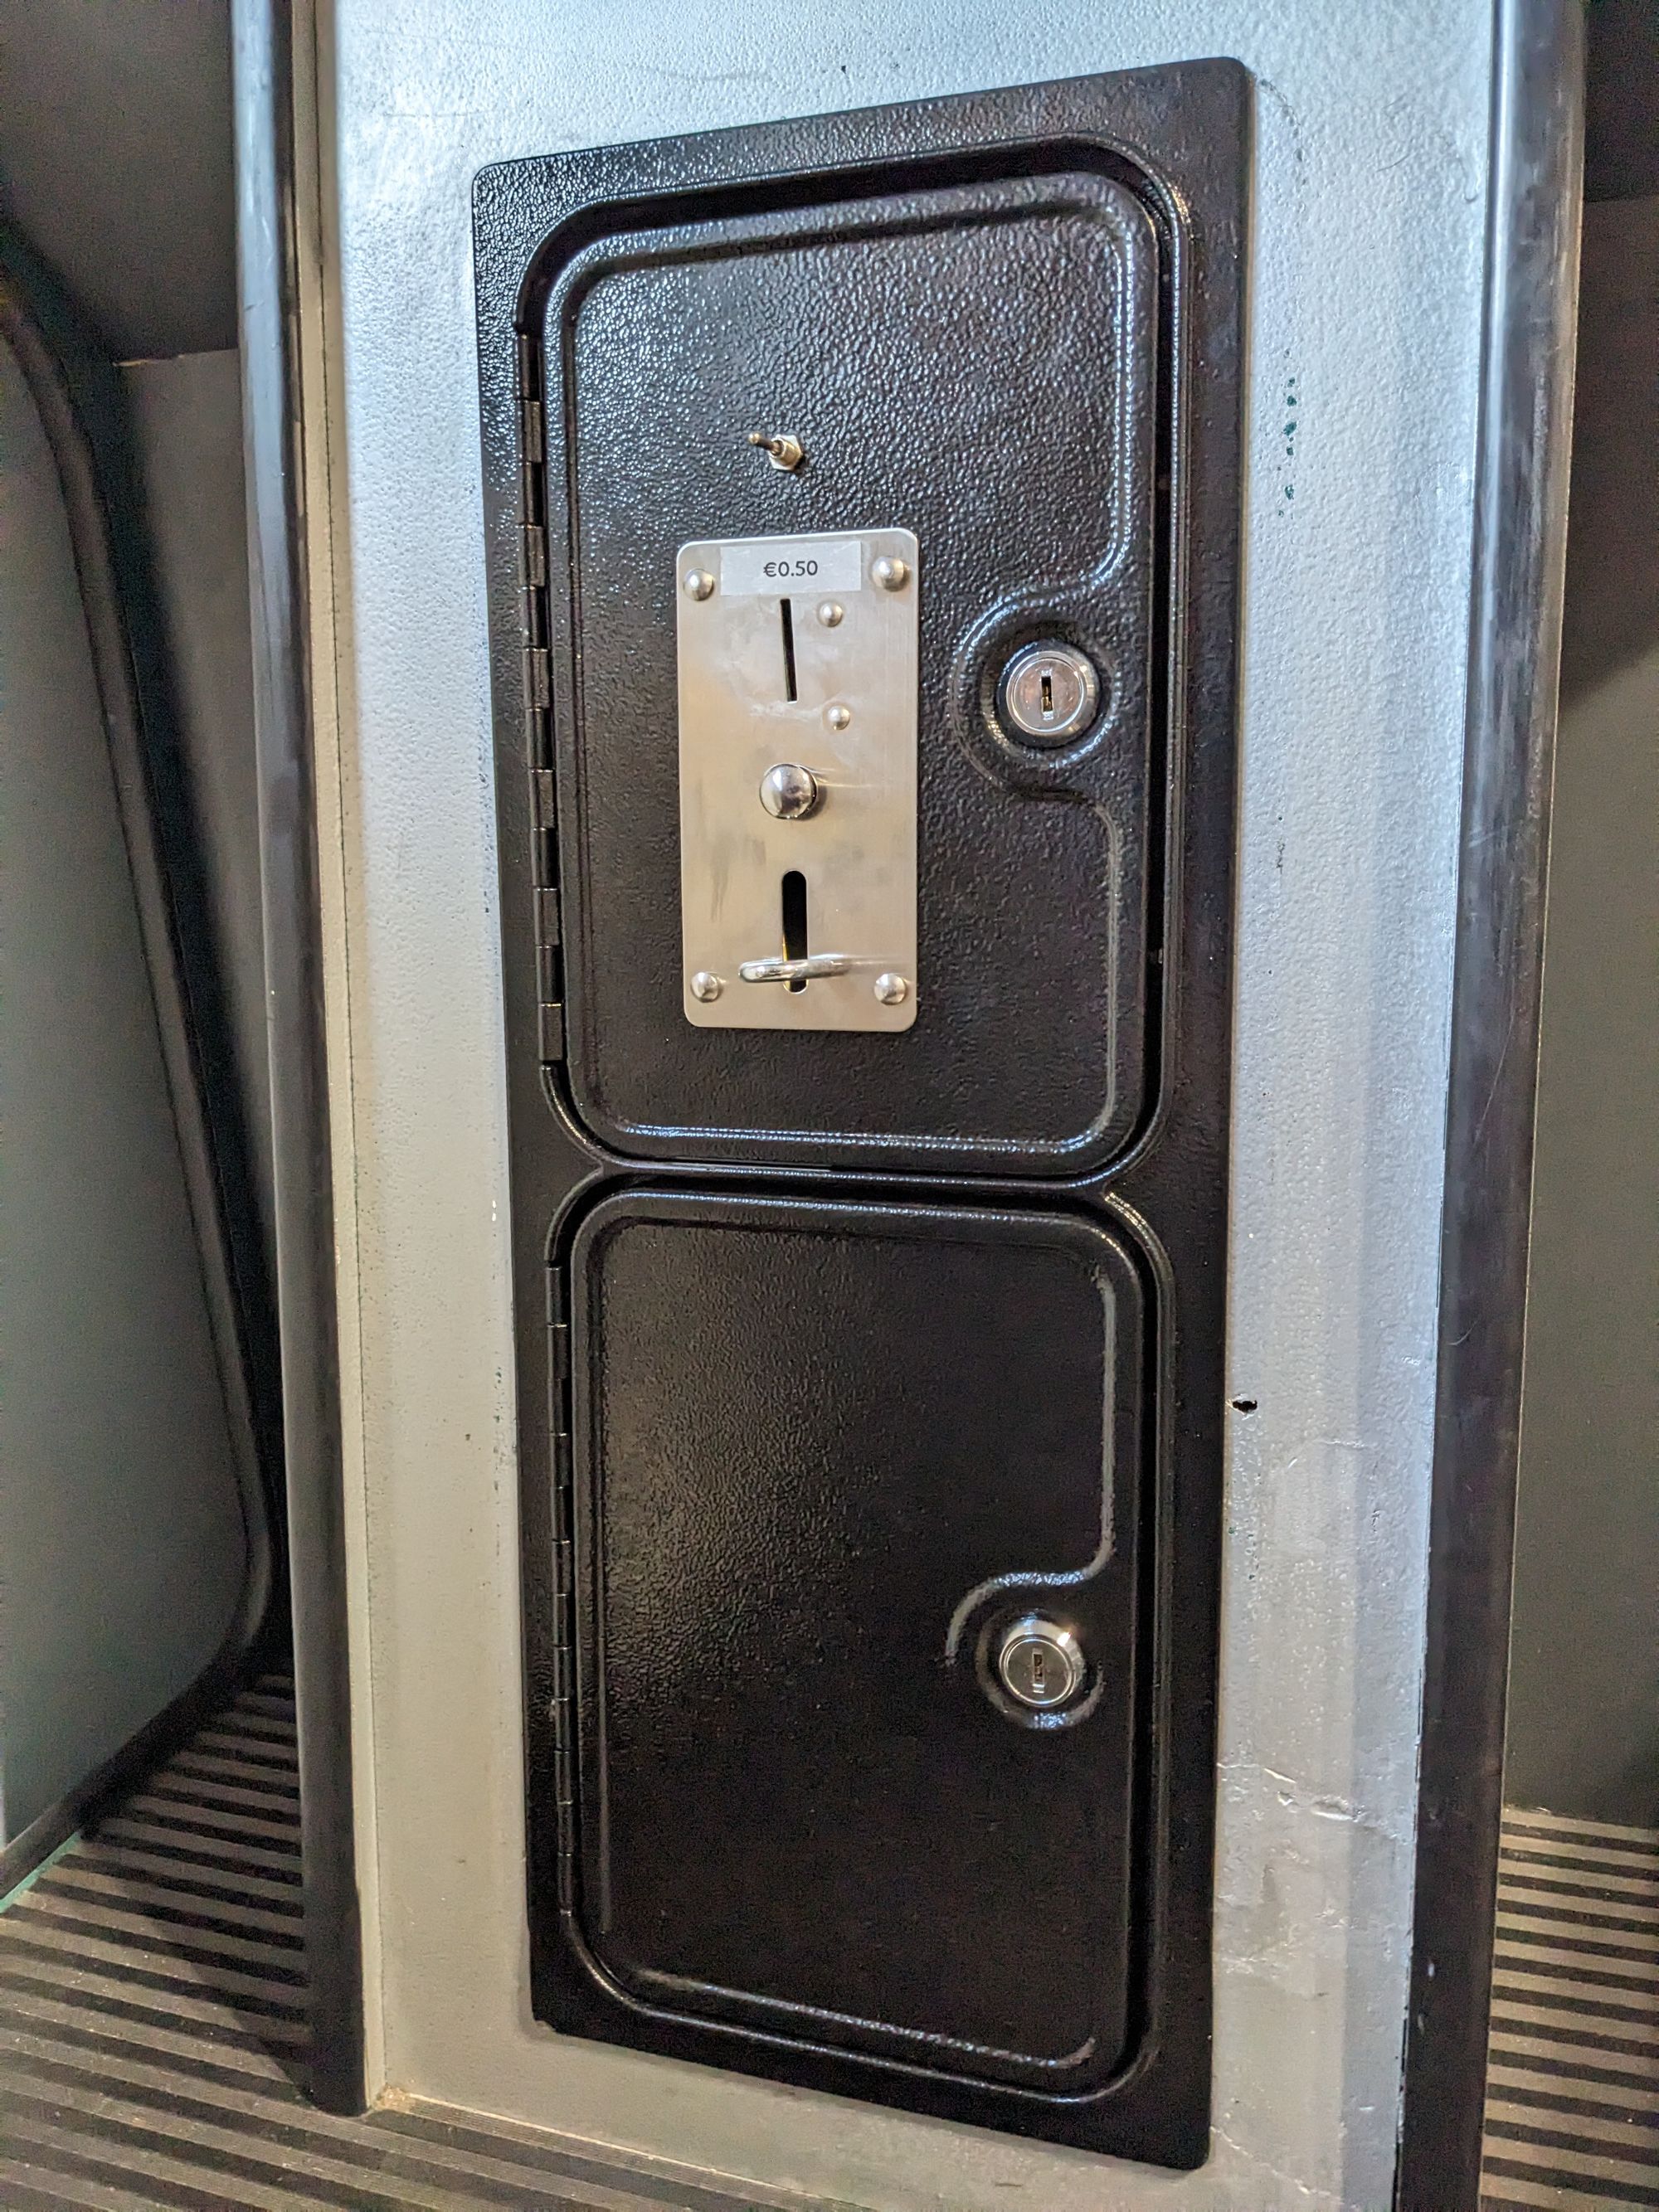
Having a coin mechanism might seem redundant for a home arcade cabinet. But for the sake of authenticity, I really wanted to install one. All the wiring was still present, as well as the old coin door. I decided to replace the entire coin door as well, seeing as the one the cabinet came with was in poor condition and would only fit one type of coin mech.
You may have noticed in the picture above that there is a coin counter on the control panel inside the machine. It was not hooked up anymore and I decided to leave it that way, seeing as it needs a special type of coin mech that is hard to find and more expensive. It would be more trouble than it's worth.
I wanted a simple coin mech for €0,50 coins. After shopping around for a bit, I found one that had exactly what I wanted. This CA Calle mechanism. It's sturdy, reliable, takes €0,50 coins, and uses a simple switch to connect to the JAMMA harness. The same type of switch that the buttons and sticks use.
After deciding on that coin mechanism, I started searching for a coin door that would fit well. I quickly found a suitable door on Aliexpress that had the right dimensions for mounting it inside the cabinet and for fitting the coin mechanism. Seeing as it was from Aliexpress I wasn't expecting much in terms of quality but I was pleasantly surprised to see that it was just as heavy and sturdy as the door that came with the cabinet.
Now, there was one more concern. Some games require or expect a separate, second coin slot for player 2. Installing a second coin mech would be rather pricey, so I came up with an alternative. I mounted a small toggle switch above the coin mechanism that switches between coin input for player 1 or player 2. In other words, the switch connects the coin mechanism to either the COIN1 or COIN2 pin of the JAMMA harness.
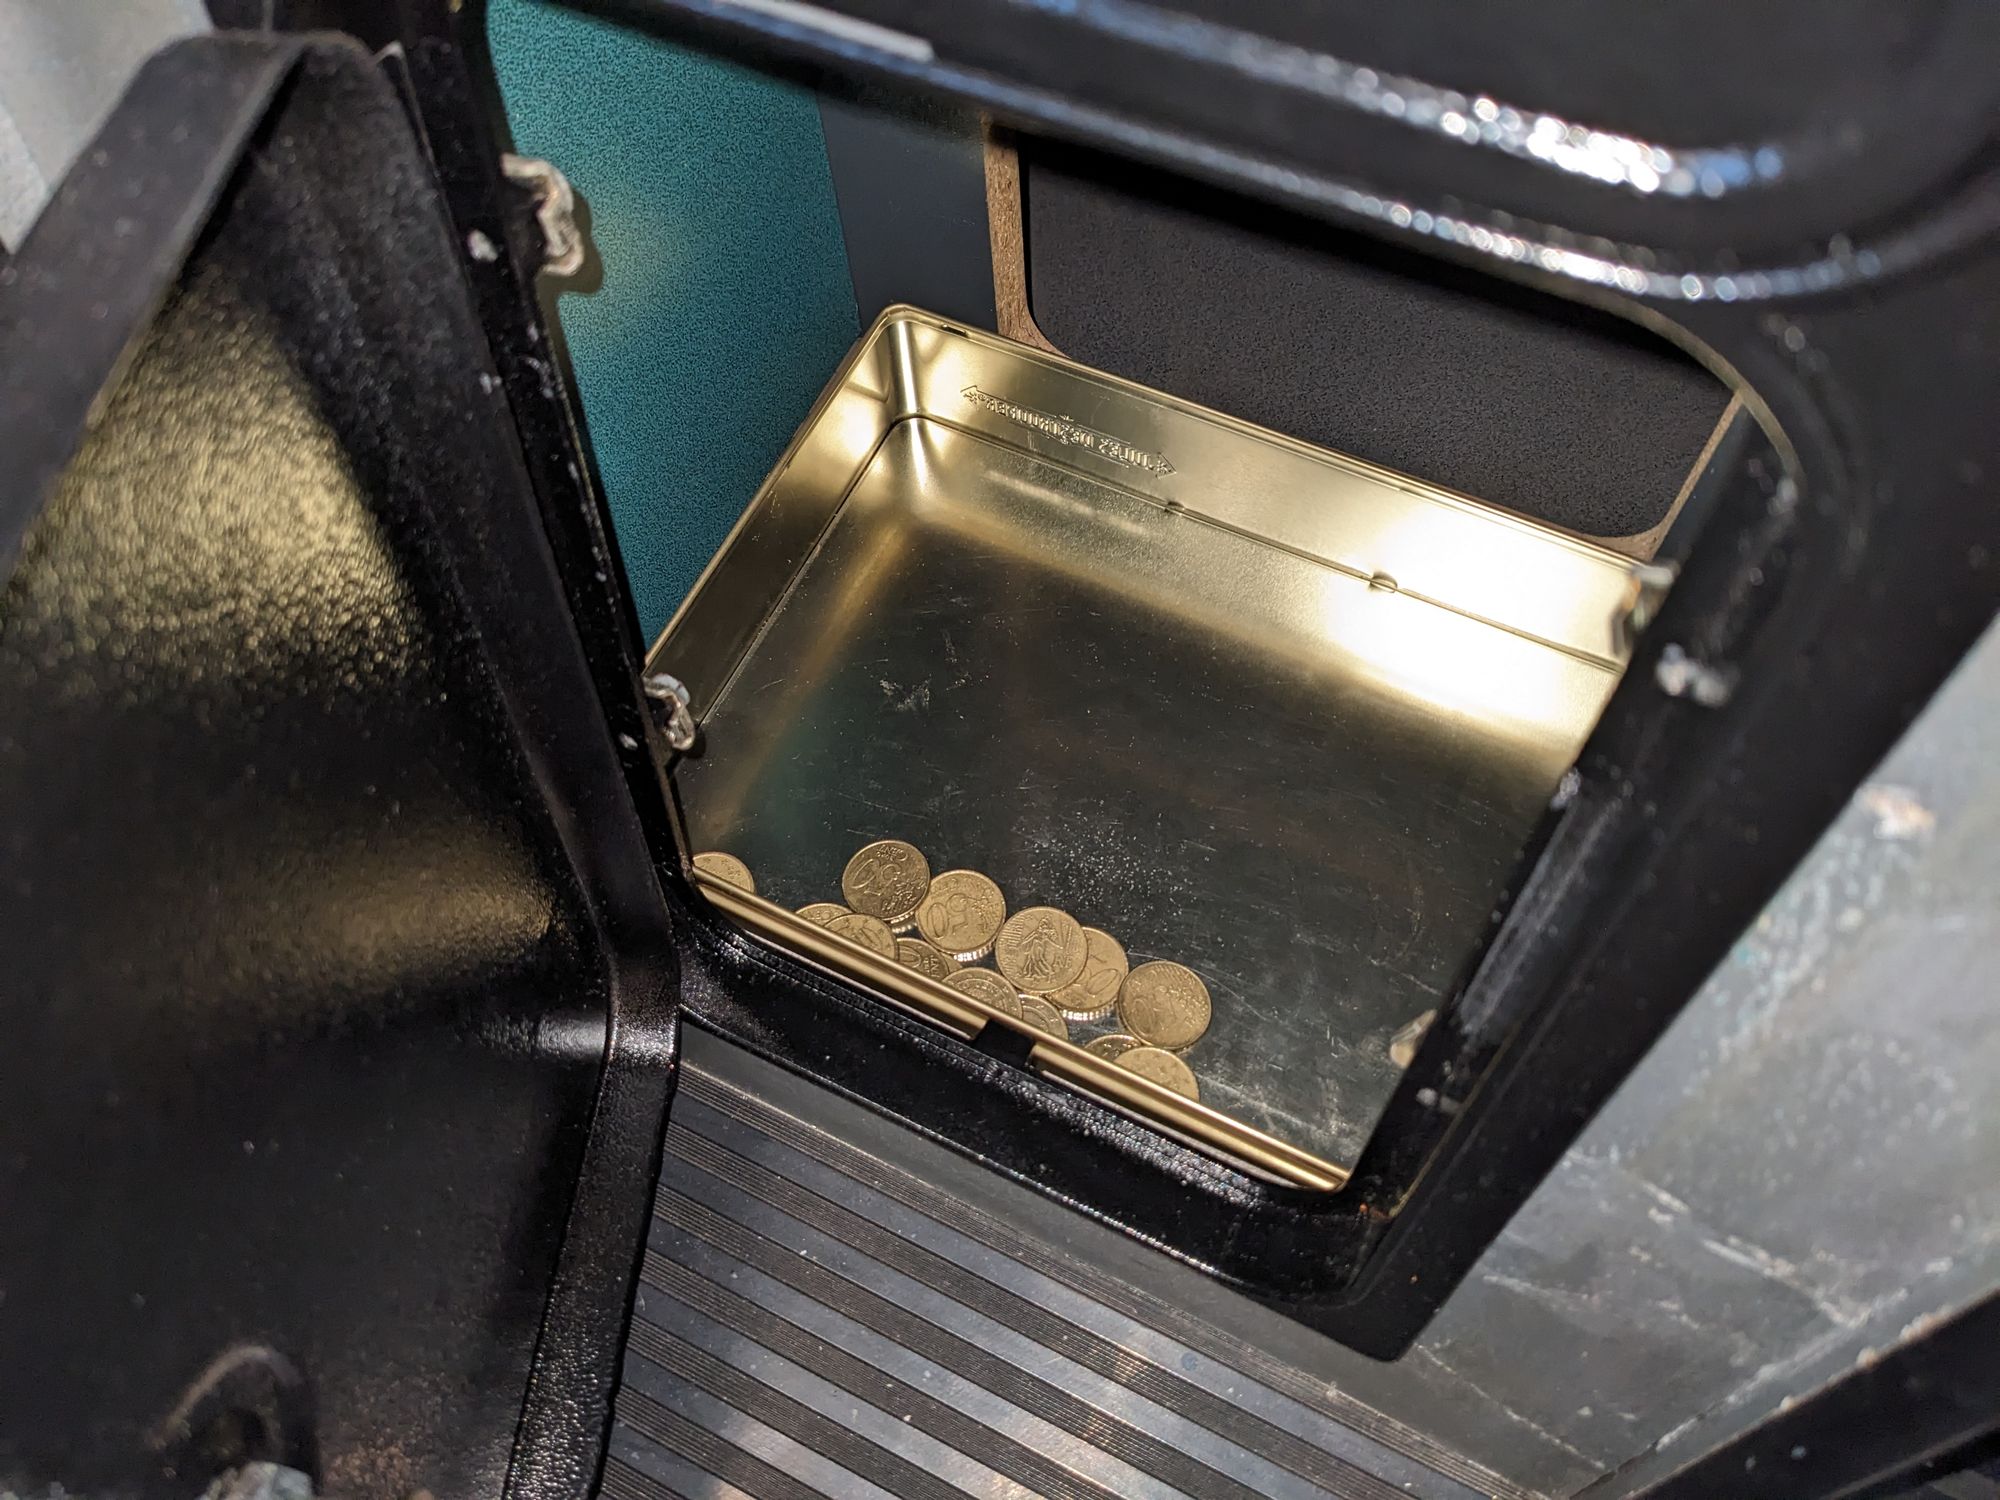
Finally, to catch the coins, I simply put an old cookie tin inside the cabinet underneath the coin mech.
All this has been working very reliably for the past few months and I'm glad it turned out so well.
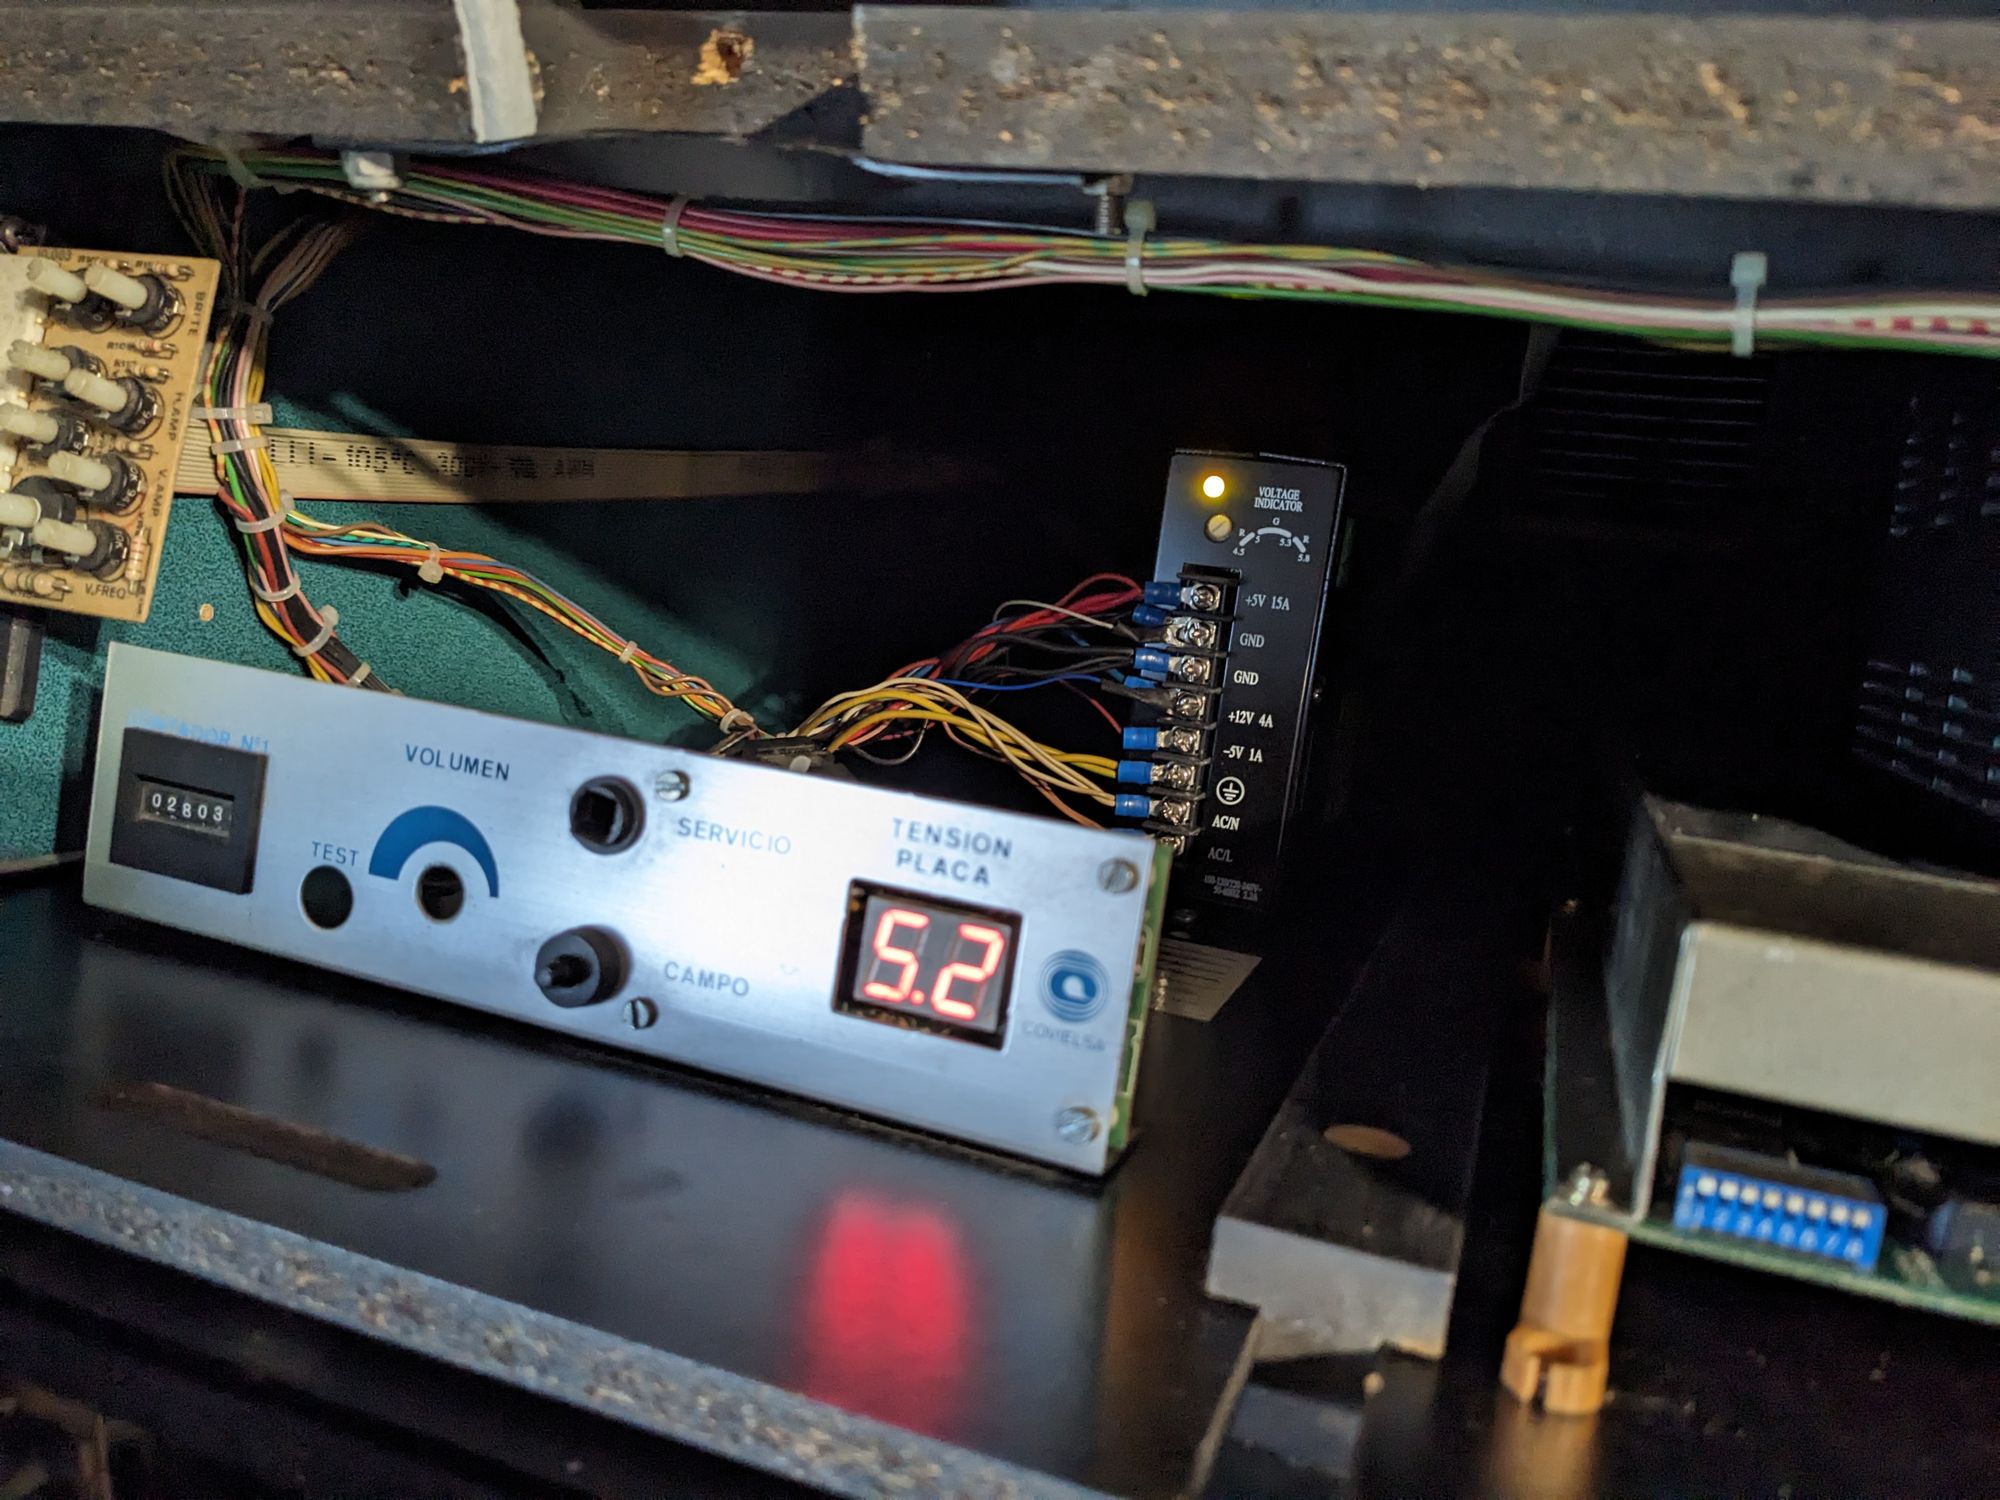
Power supply
The power supply that came with the cabinet was a "VIC-9916A". I'm guessing that this is not the cabinet's original supply and that a previous owner had already replaced it with this one at some point. The PSU being a lot cleaner than all other components made me suspect this.
It wasn't working very well, unfortunately. In front of the PSU, on the little control panel, there is an integrated segmented display that shows a measurement of the 5V rail. This display showed the voltage being very unstable, constantly fluctuating between +- 4.8V-5.2V. After reading up on this PSU, I quickly learned that these do not have the greatest reputation when it comes to reliability and quality. That being the case, I figured it was best to just replace it.
I ended up buying a 130W Wei-Ya PSU. This was a drop-in replacement for the old PSU. All that needed to be done was to unscrew the wires from the old one and screw them in the matching spots on the new one. After the replacement, the voltage was perfectly stable. This unit is supposed to have better quality components and safety features like overload protection. It has been working perfectly for the past few months, so I'm hoping it will last for a long time.
Marquee light
Behind the marquee was an old fluorescent tube with a starter that looked like it had been in contact with fire or extreme heat. I decided to replace it with a more modern, safe and power efficient solution: LED strips.
I removed the fluorescent tube fixture and put 2 LED strips in its place. The strips need 12V for power, so I simply ran a wire from the strips to the arcade PSU. This solution worked perfectly and I'm very happy with how it looks.
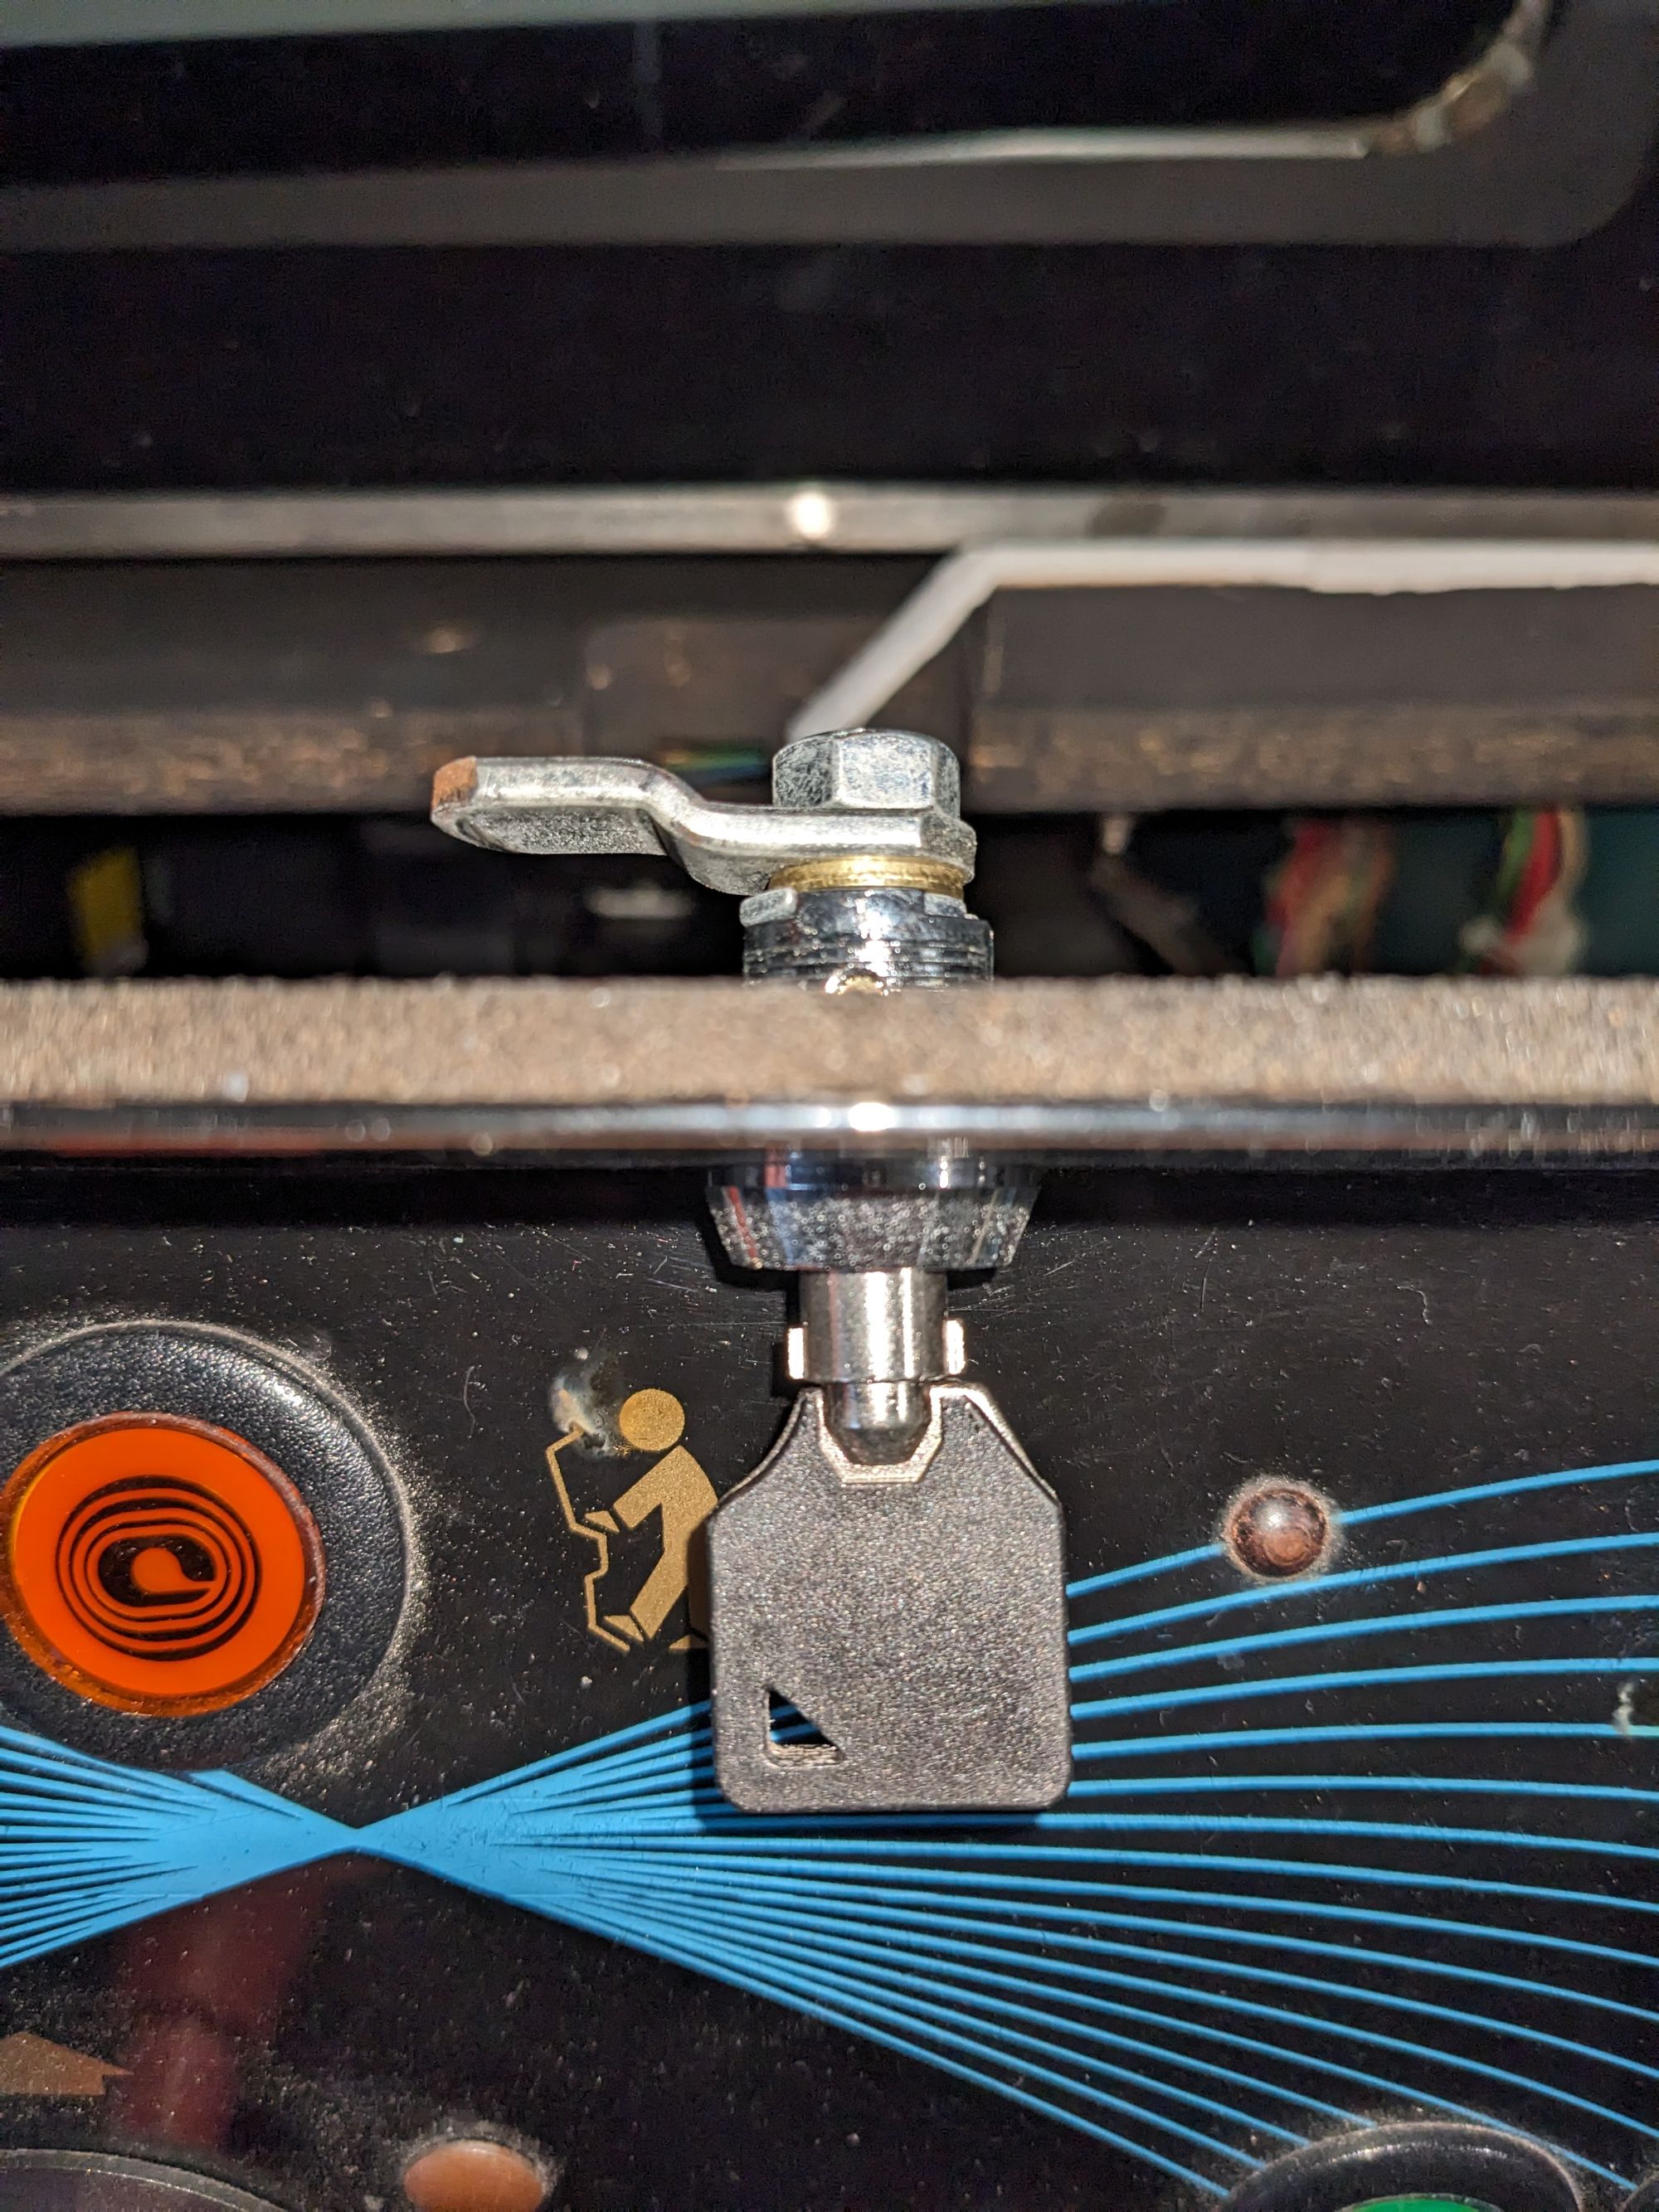
Locks
The locks were quite a pain to get right. One lock was missing on the control panel. The lock that allows access to back of the cabinet (required to work on the CRT), was missing its key. I wanted to replace all locks, seeing as they were either impossible to open, or didn't turn smoothly at all.
Getting the old locks out was the easy part. The locks that I had the key for could just be removed by unscrewing the nuts. The other lock I simply drilled through to force it open.
Finding new locks that would fit proved to be a big challenge though. Finding ones for the coin doors went fine, but I couldn't find any locks that were exact matches for the control panel and back door. The first set of locks I bought were too short for the back door and too long for the control panel. I then ordered a second set of locks that had a fitting length, but those didn't have the lock's lever in the right position. To fix this, I bought some metal rings and nuts with varying thickness to give the lever some padding. By doing this, I was able to get everything to fit just right.
Neo Geo MVS board
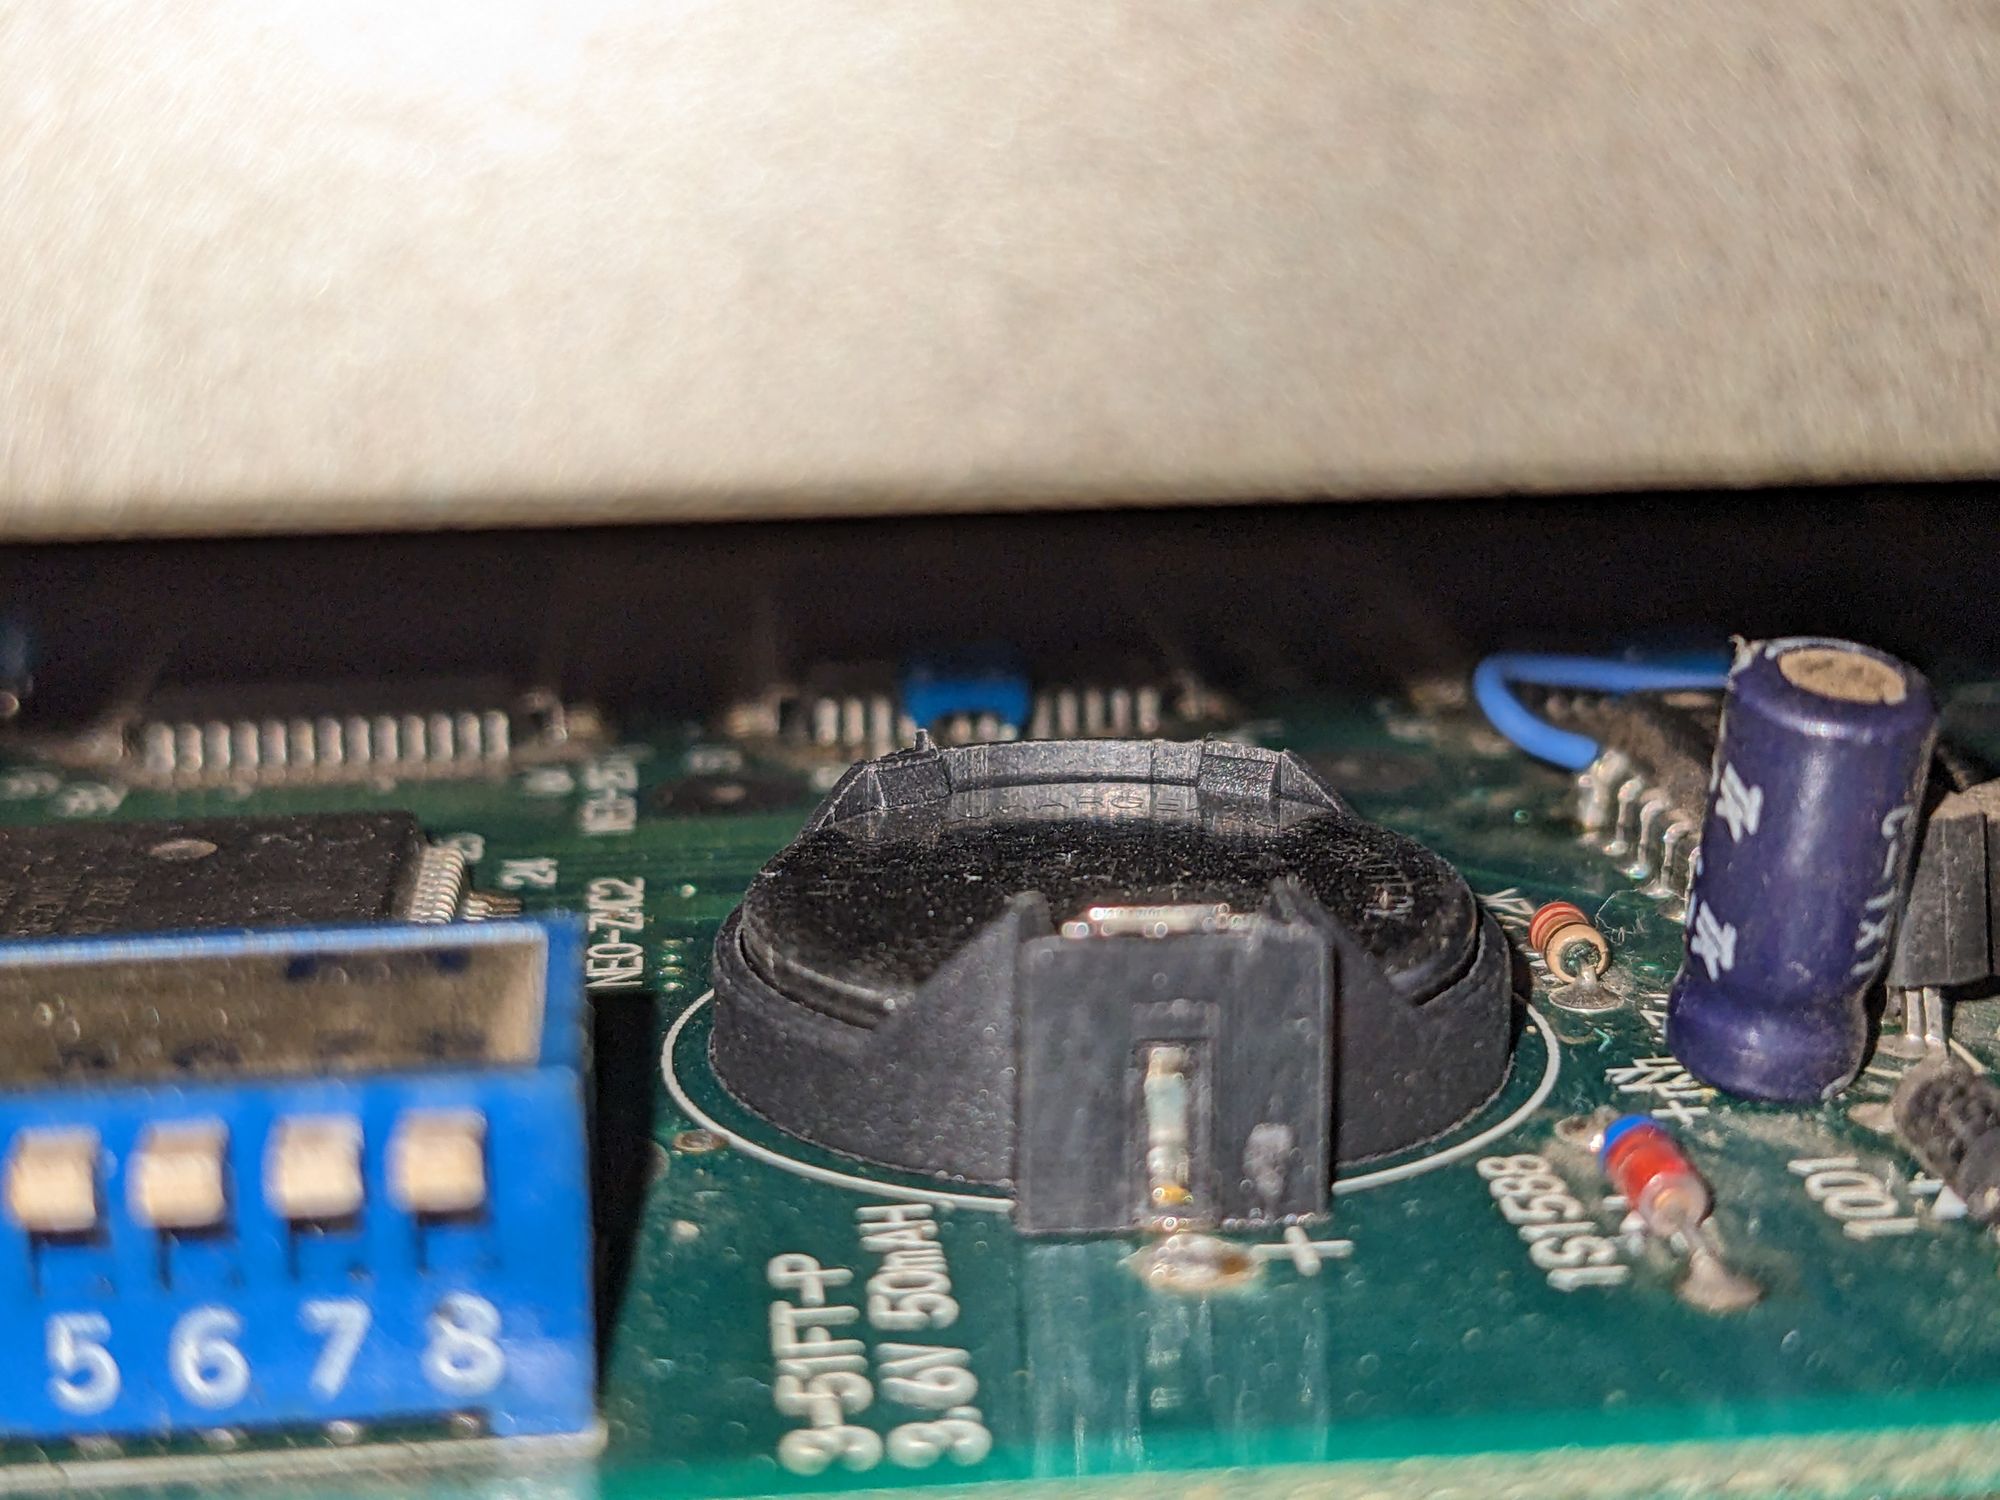
The Neo Geo board was mostly very dirty. The only real issue with it was that it wouldn't save any settings or scores.
I started by giving it a thorough clean with isopropyl alcohol. As always, I paid extra attention to the potentiometers and the cart slots.
The system not saving anything had to do with the on-board battery having died. Luckily, this is an easy fix. I de-soldered the old battery and put a CR2032 holder in its place. I put a LIR2032 battery in the socket. A LIR2032 is essentially a rechargeable CR2032. The original battery on the board was also rechargeable, so a LIR2032 should be a suitable replacement.
With that done, the board was fully working again! Settings and scores can now be kept, even when the machine is turned off for extended periods of time.
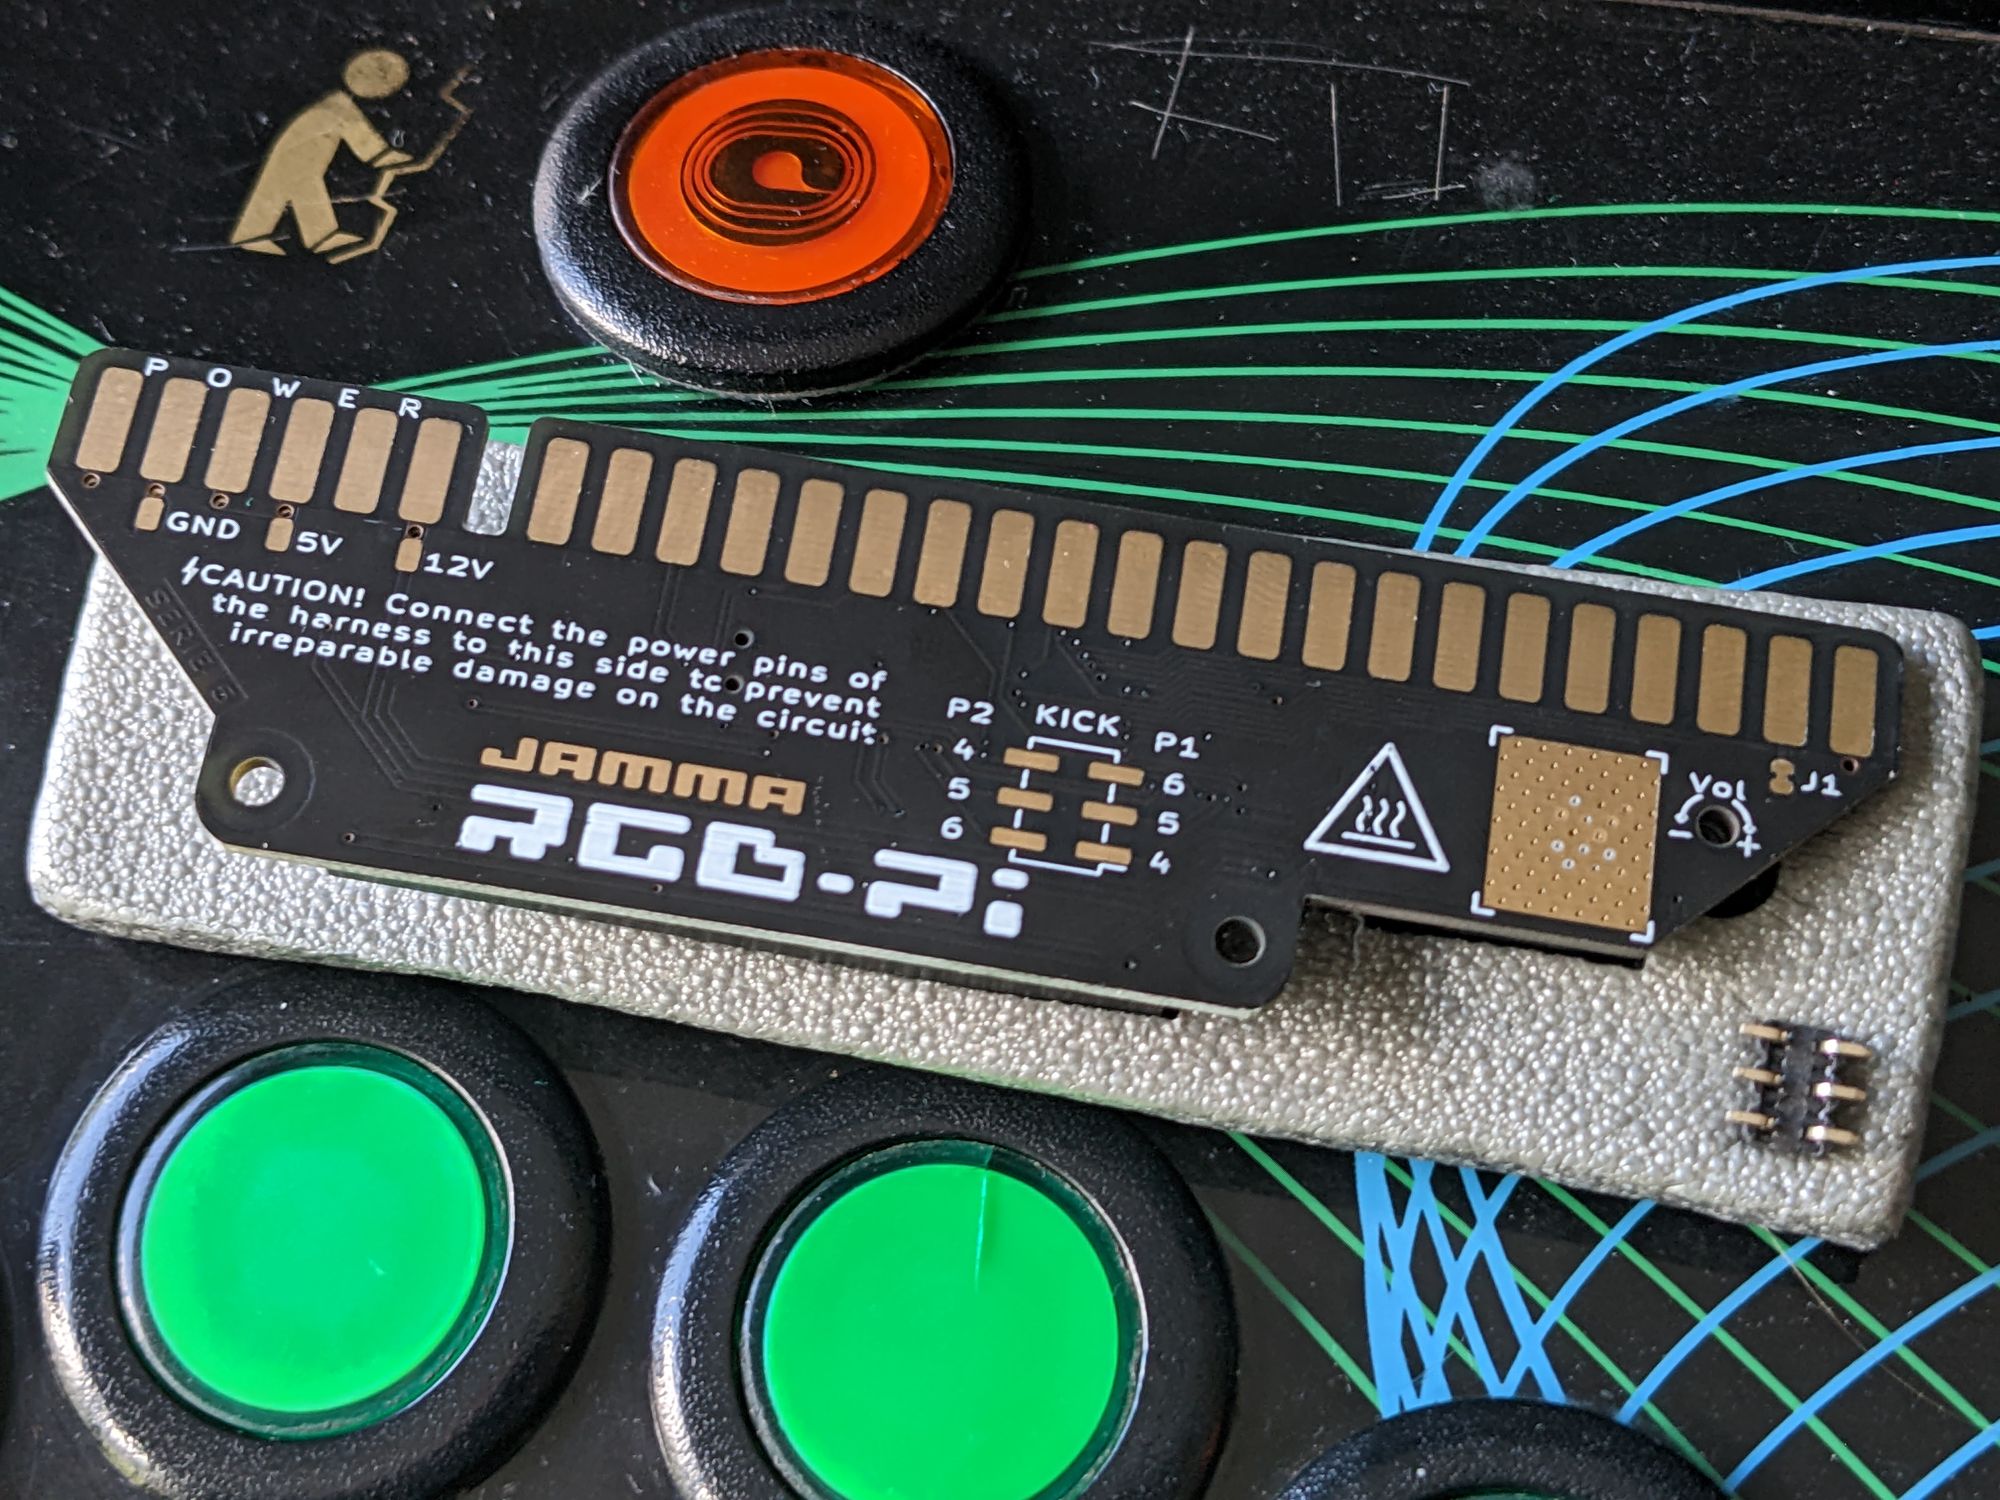
Adding more games: RGB-PI JAMMA
While the Neo Geo MVS can provide hours of entertainment, the cabinet wouldn't be complete for me without the 80s classics from the likes of Nintendo and Namco.
There are several ways to add more games to a JAMMA cabinet. You can buy several plug-and-play solutions from China like the famous '60-in-1 icade' board or one of the many 'pandora box' boards. While these can be great options for those looking for an easy solution, I found them to have pretty lacklustre emulation, which ruins the experience for me. In addition, these don't really allow for much customisation when it comes to the game selection or menu design.
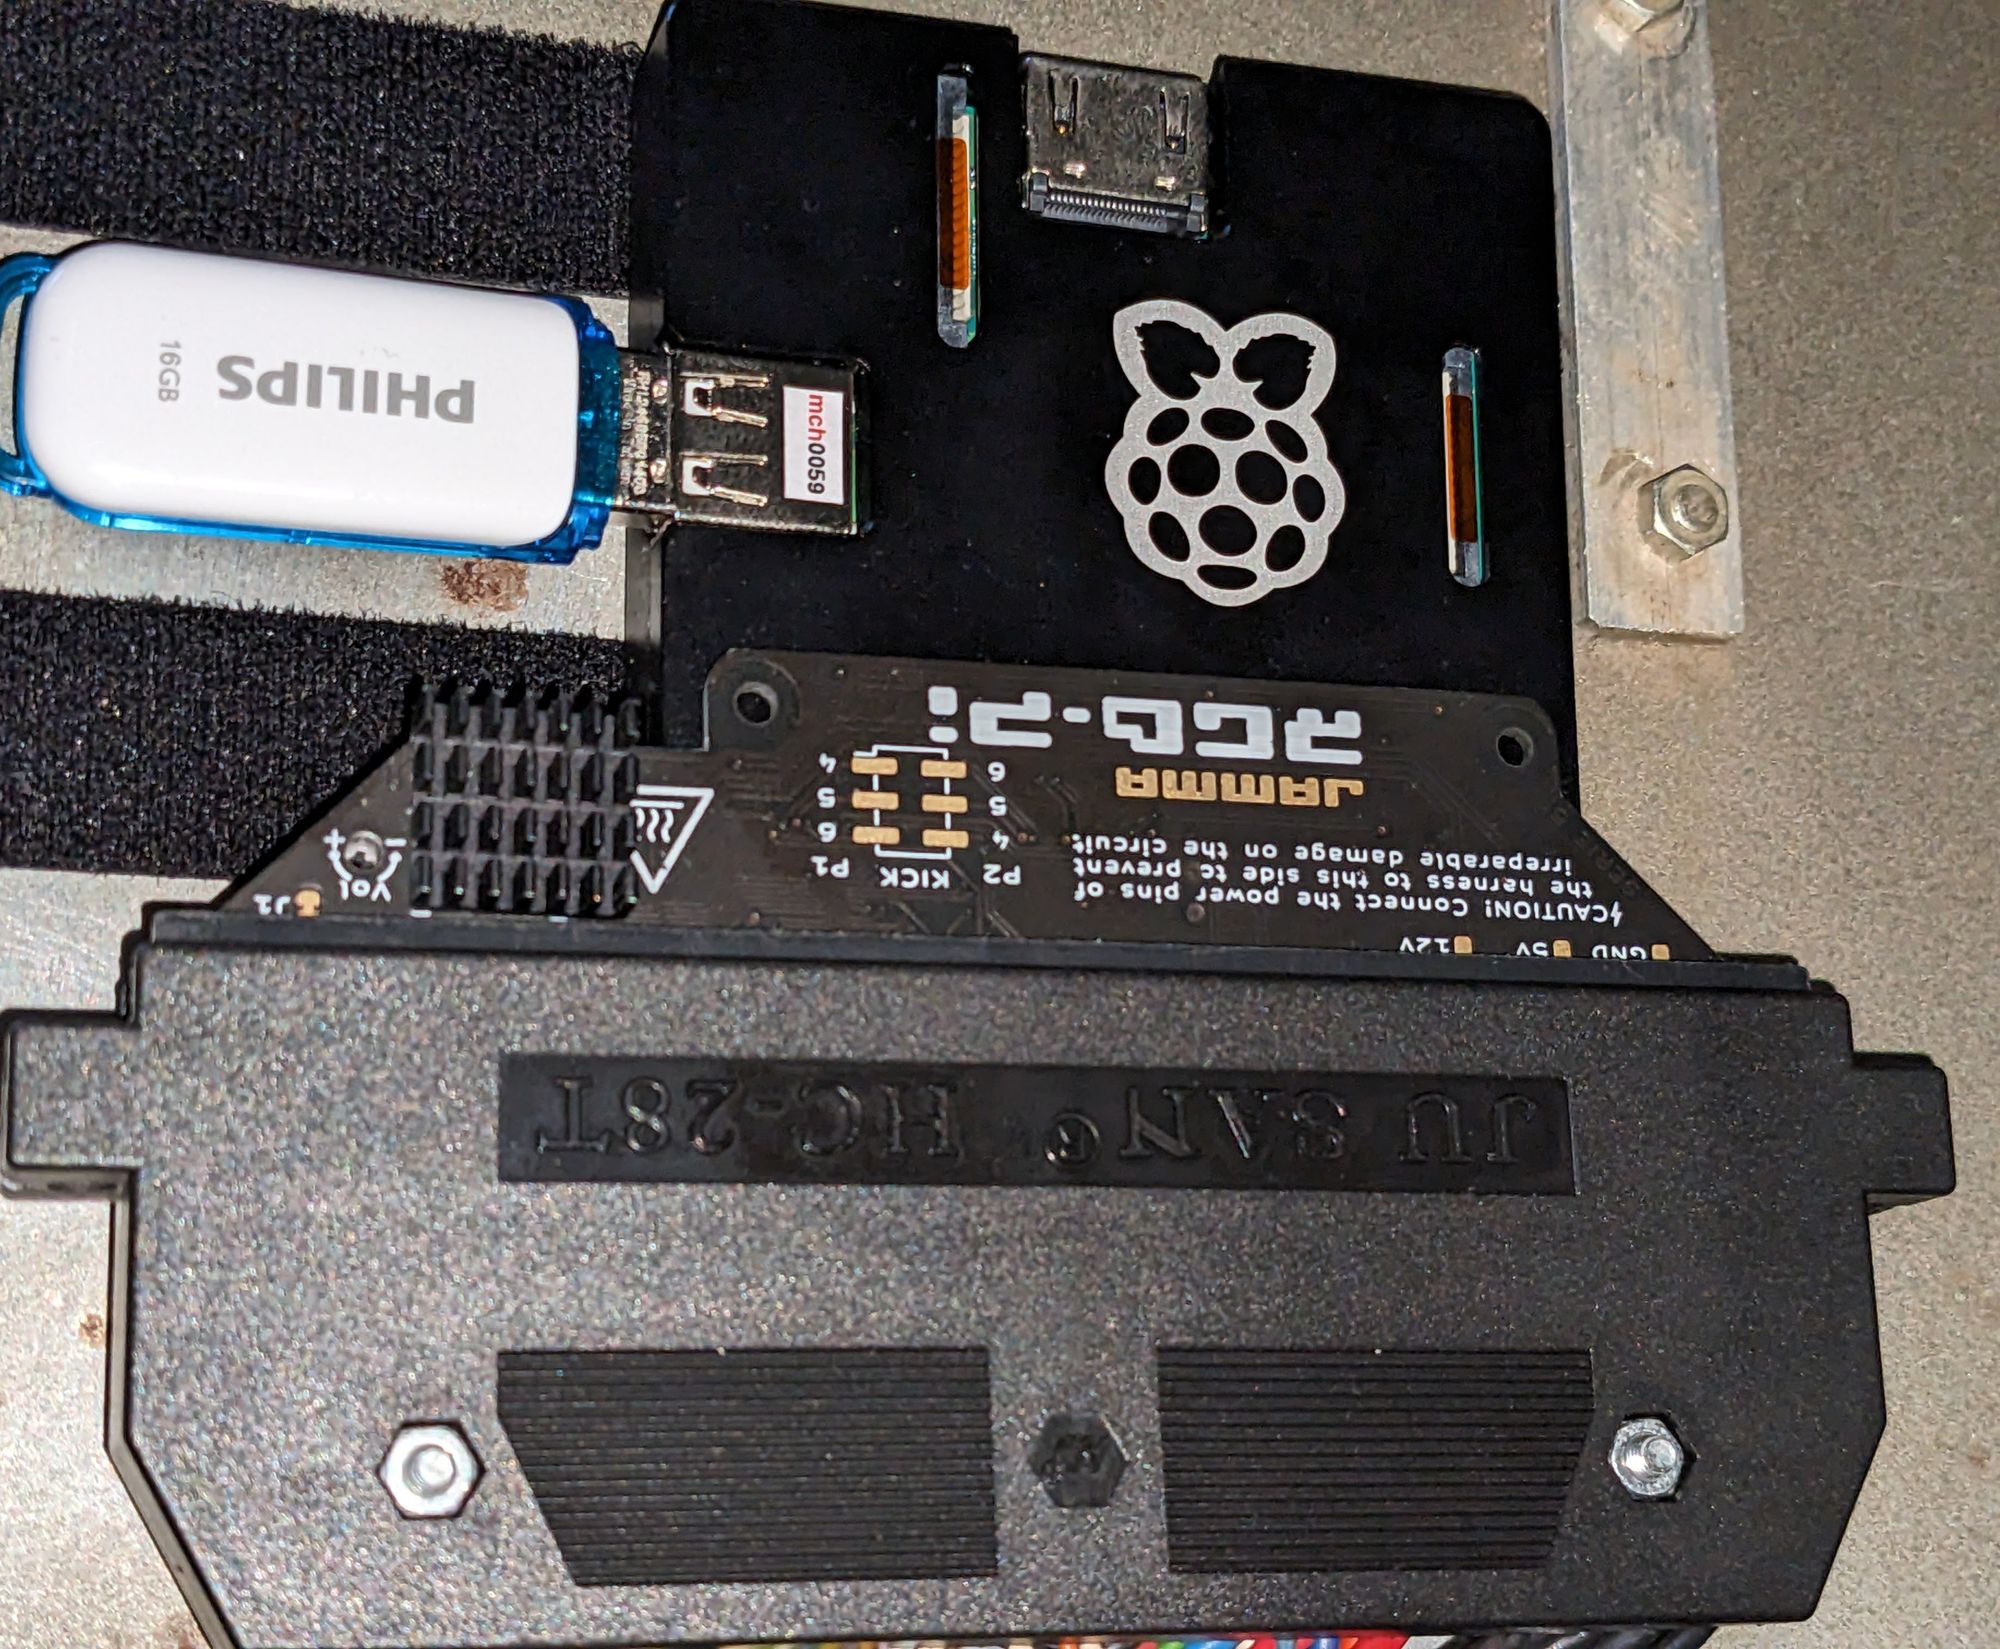
The solution I ended up using is the RGB-PI JAMMA. As the name suggests, this is an adapter that allows you to hook up a Raspberry Pi to a JAMMA cabinet with a CRT monitor. Before getting the cabinet, I had been emulation arcade games using the RGB-PI SCART on a regular consumer CRT TV. This solution had always worked fantastic, so picking it for the cabinet made sense.
What makes the RGB-PI special compared to other RPI-based solutions is the custom OS it comes with. It has been tweaked to work perfectly with CRT displays and to provide an experience that's as accurate as possible. The team really did a great job here. I'm usually very picky about accuracy and emulation quality, but playing these games with this adapter and OS makes them feel nearly indistinguishable from the original hardware. This is thanks to the accuracy of recent MAME / FB NEO versions and the OS having perfectly tweaked settings for each of them for displaying on a CRT.
As luck would have it, someone already created a Covielsa Green Gold themed skin for the OS. I customised it slightly to match the Optima-28 branding of my cabinet, resulting in a menu that looks very fitting.
All that was left to do was to add my favourite games, change some settings. The whole installation process was quite easy and pain-free.
Final tweaks
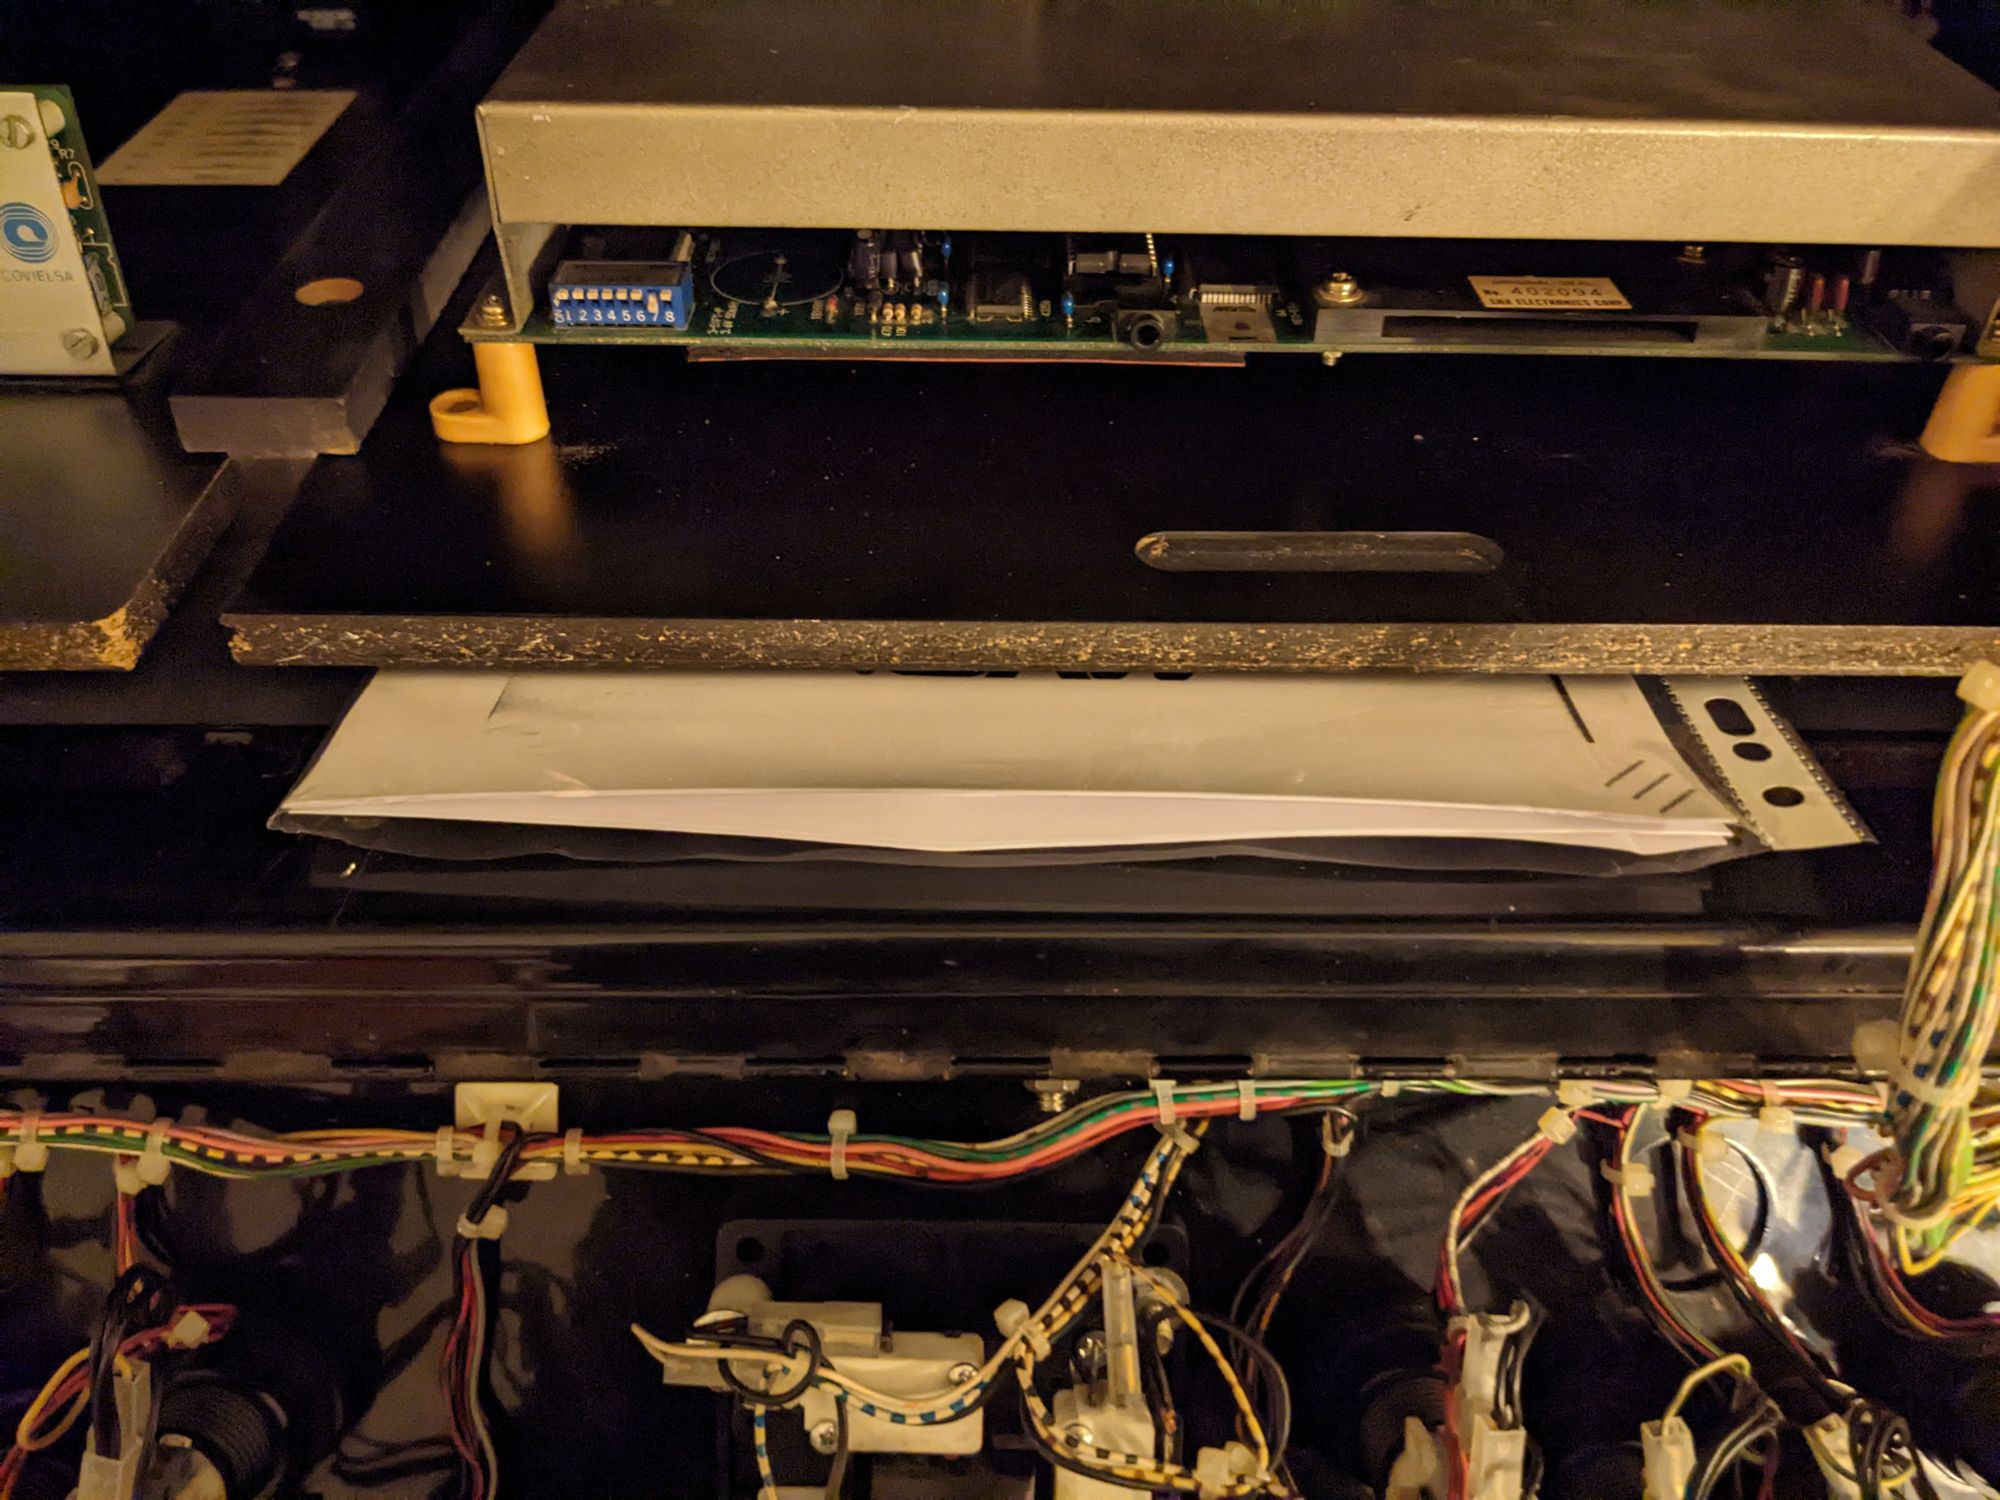
For the sake of convenience, I printed out the service manuals for the MVS board and CRT monitor and put them in a sleeve inside the cabinet. If I need to change a setting, I can quickly take out the manual for reference.
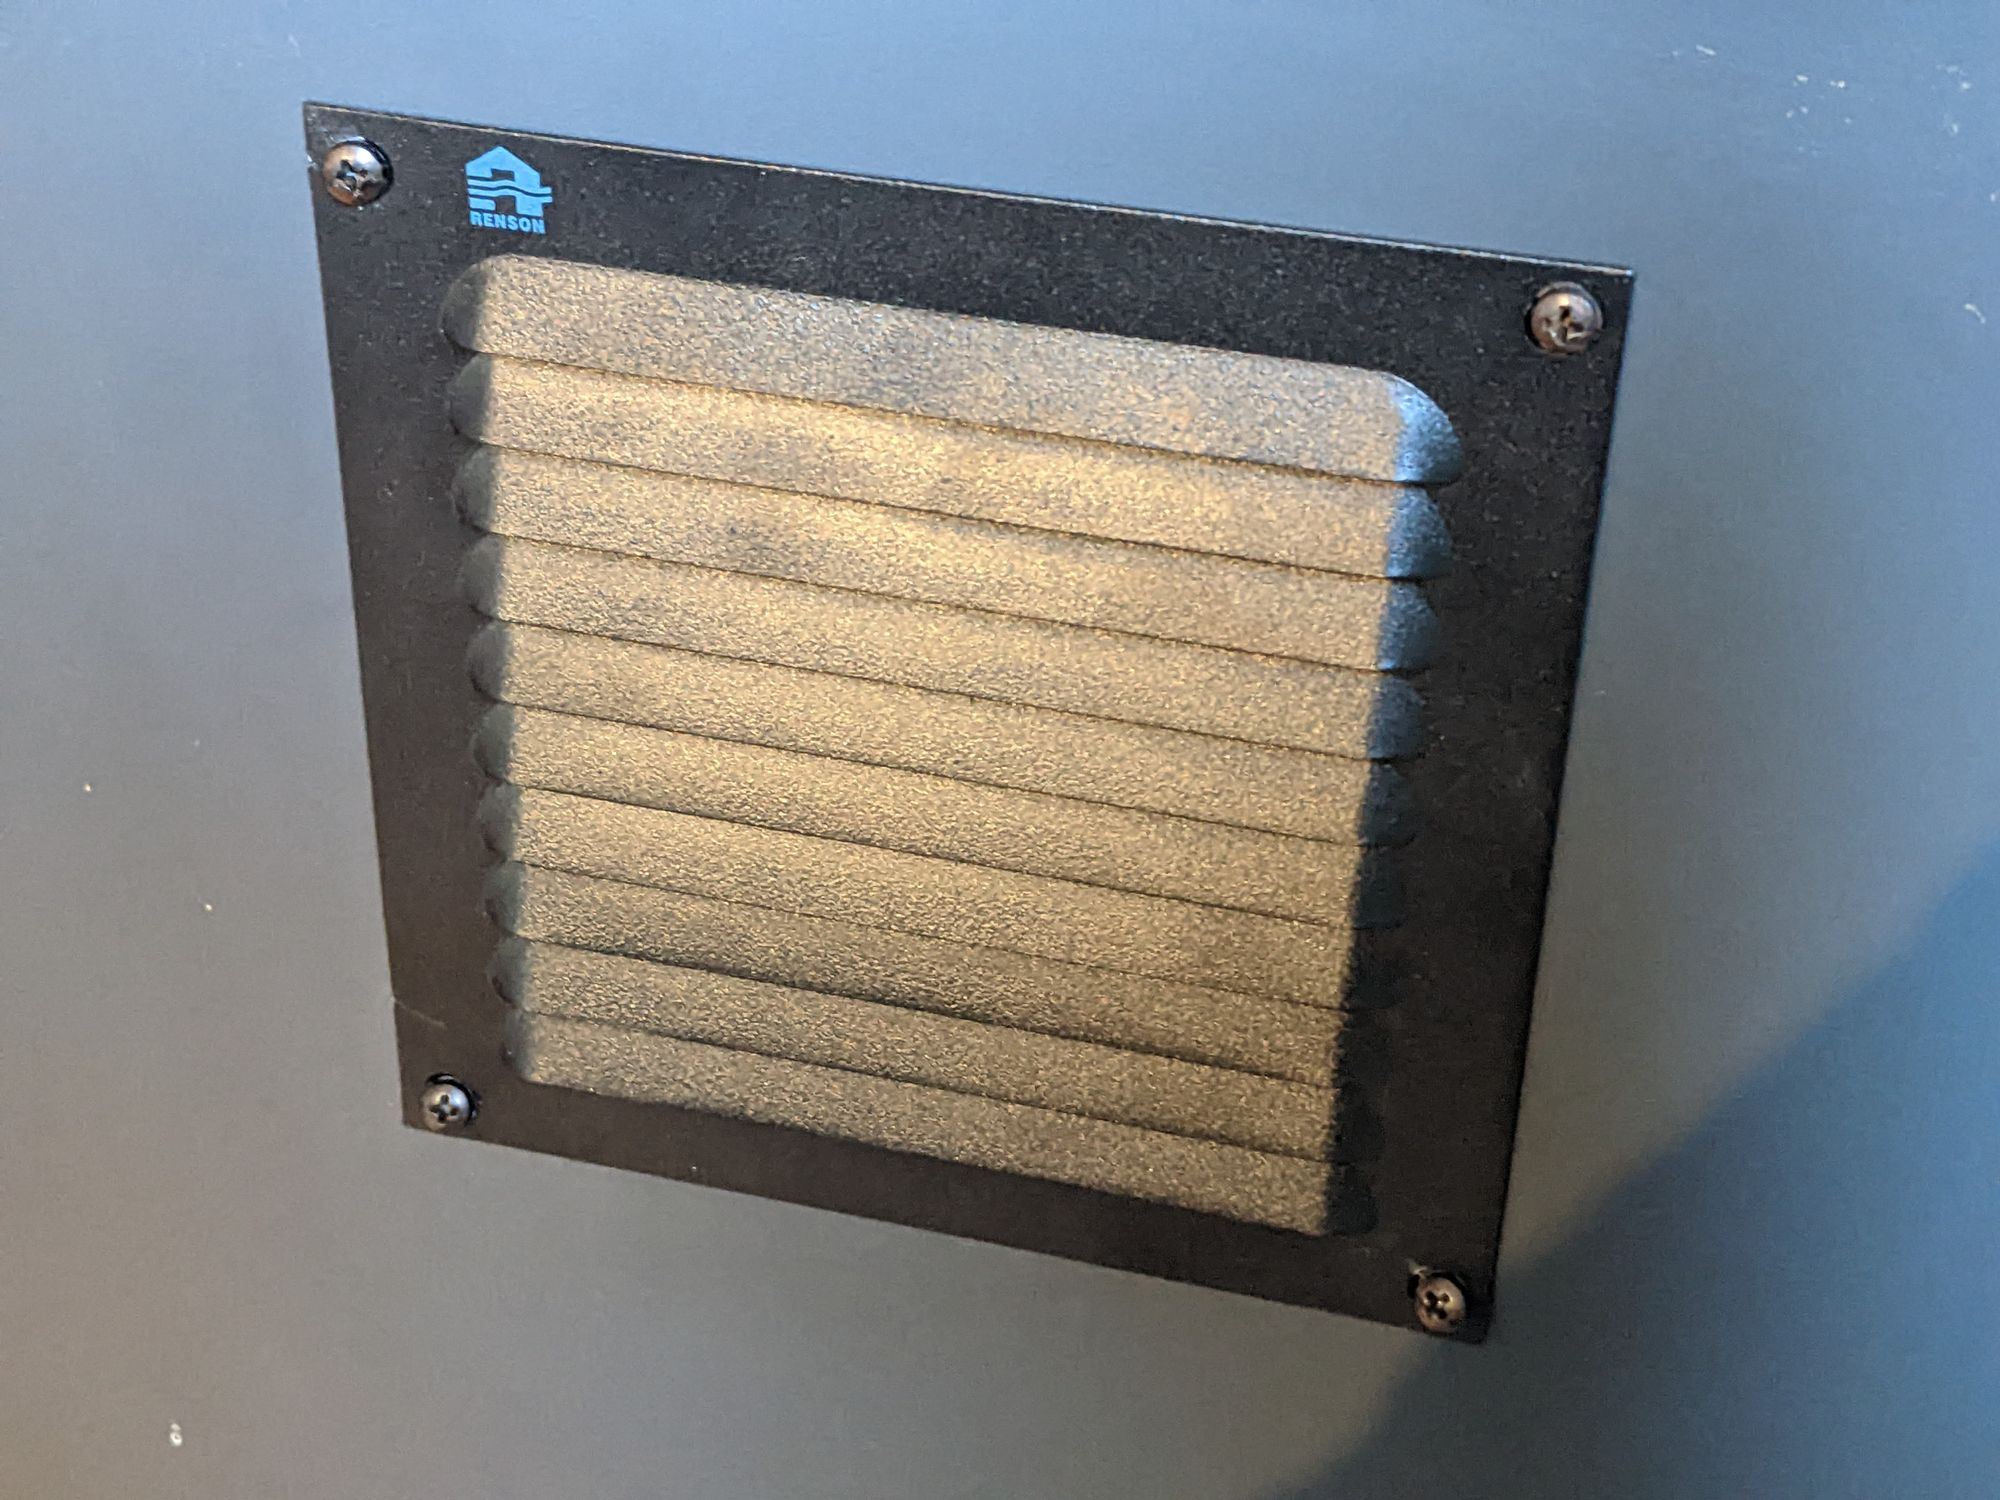
The cabinet had some air vents on the top and in the back, which looked really beat up. I replaced those with some new ones that I found in a hardware store.
Lastly, I replaced the two worn out rollers on the bottom of the cabinet with 4 proper wheels so the entire thing can be moved around easily.
Documentation & resources
Here's a list of links to useful info and resources for those with a similar arcade machine:
- The RGB-PI project and JAMMA installation docs
- RGB-PI's skin repository, including the Green Gold skin.
- This page on recreativas contains some photos and details on the Covielsa Green Gold.
- A forum thread showing someone else going through the process of repairing one of these machines. It has some photos of the original coin mechanism and other details.
- Another forum thread showing the steering wheel control panel for the Covielsa Green Gold.
- HardMVS: a fantastic site with lots of information about Neo Geo hardware.
- Service manual for Intervideo arcade monitors.
- Operator manual for the Intervideo VP-series.
Photos of these documents were kindly provided to me by Alberto Perez Soler.
Closing notes
I'm very happy with the current state of the machine. However, there is still some room for improvement.
The button lights don't all have the same brightness, probably due to some of them having aged more than others. I'll probably look into replacements when some of them die completely, which I feel will happen soon.
Another important consideration are the capacitors on both the CRT chassis and MVS board. Both still work fine and all capacitors look fine visually, but they will likely need to be replaced in the foreseeable future. I plan on replacing all capacitors in the machine at some point as a preventative measure. I delayed doing it for the time being because everything works for now and because I already spent a lot of time on the machine. Recapping everything will be a very time consuming process, especially with that CRT.
One last thing I consider doing is adding some more control options like a trackball and/or spinner. This would make playing games Arkanoid, Centipede or Segasonic the Hedgehog feel a lot more authentic.
Thank you for taking the time to read this article. I hope it was entertaining and that the documentation and ideas will be useful to others with a similar cabinet.